Last updated on April 19th, 2024 at 01:51 am
Looking to improve the security of your online accounts? Enabling two-factor authentication (2FA) with an authenticator app is a great place to start! In this guide, I’ll cover what an authenticator app is and how to choose one that works for you, before giving you step-by-step instructions on how to use it. But first, let’s quickly recap 2FA.
Table of contents
- What is 2FA?
- What is an authenticator app?
- Which authenticator should I choose?
- How do I use my authenticator app?
- Why aren’t my authenticator codes working?
- Authenticator app alternatives
- The takeaway
What is 2FA?
2FA is an extra layer of security you can add to your online accounts. Once you turn it on, you’ll need to prove your identity in an additional way after you enter your username and password.
The most popular way of doing this is to receive a code via text. However, this form of 2FA, known as SMS-based 2FA, is not very secure or private. And that’s where other methods, including authenticator apps, come to the rescue.
What is an authenticator app?
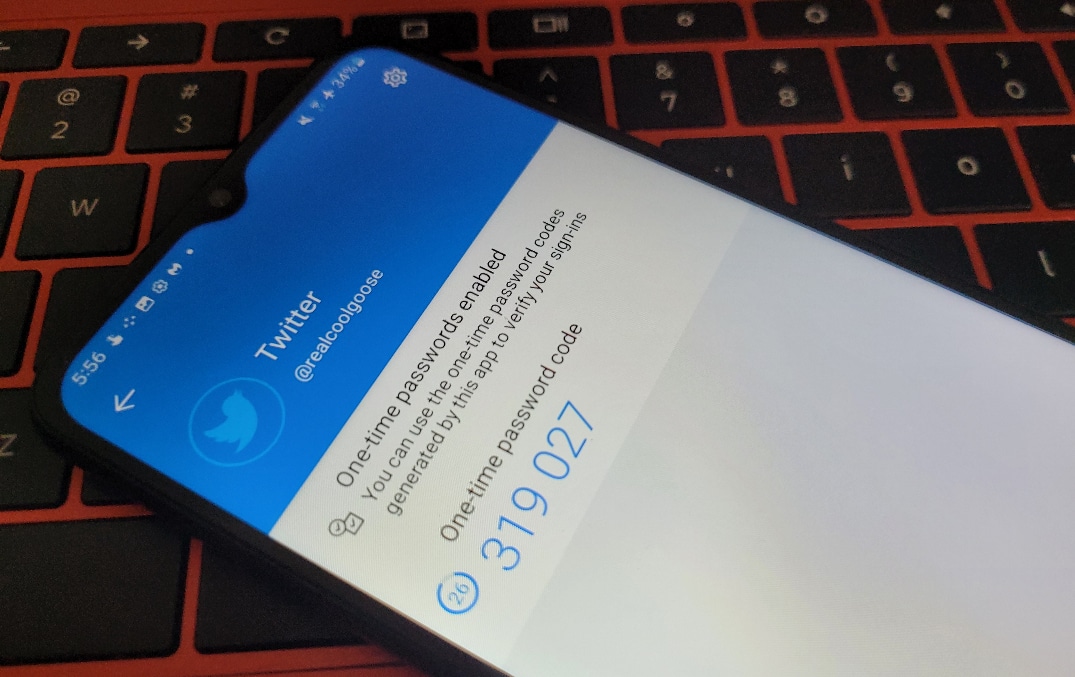
Authenticator apps generate six digit codes that change every 30 seconds. They are usually installed on your phone, though some authenticators have desktop apps and browser extensions as well.
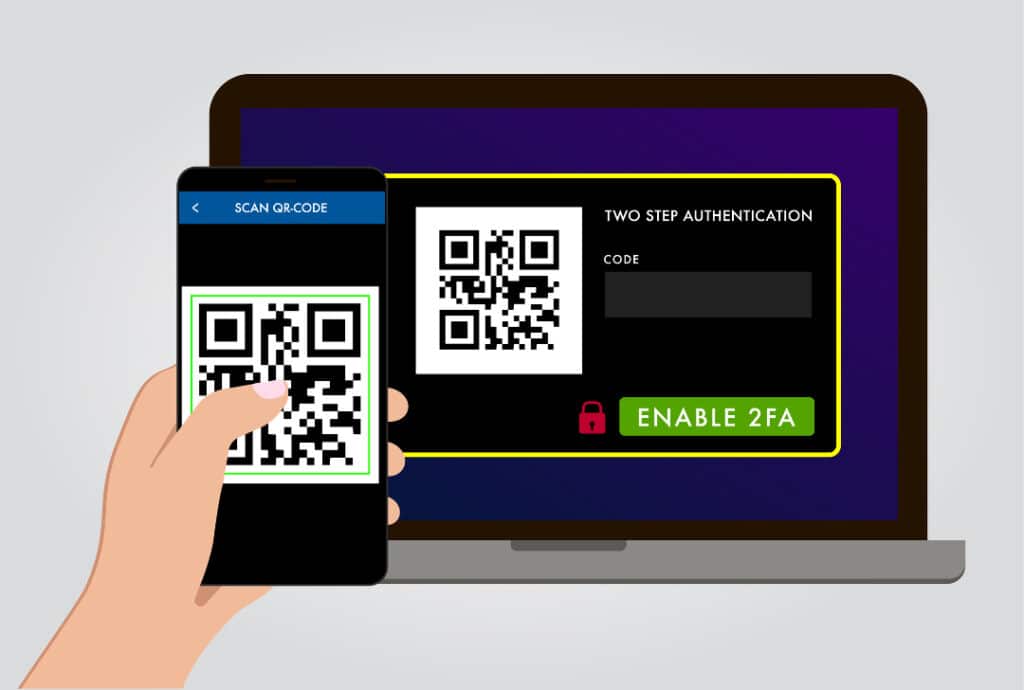
To use an authenticator app for 2FA, you must first link it to your online accounts. You can do this by using the app to scan a QR code generated by each service you have an account with, e.g. Gmail, Dropbox, Twitter.
Once linked with an online account, the authenticator will generate a new six-digit code specifically for that account every 30 seconds.
When you log in to that account, you’ll need to enter the current code displayed by your authenticator app after you’ve entered your username and password. This makes it incredibly difficult, though not impossible, for cybercriminals to hack you.
Which authenticator should I choose?
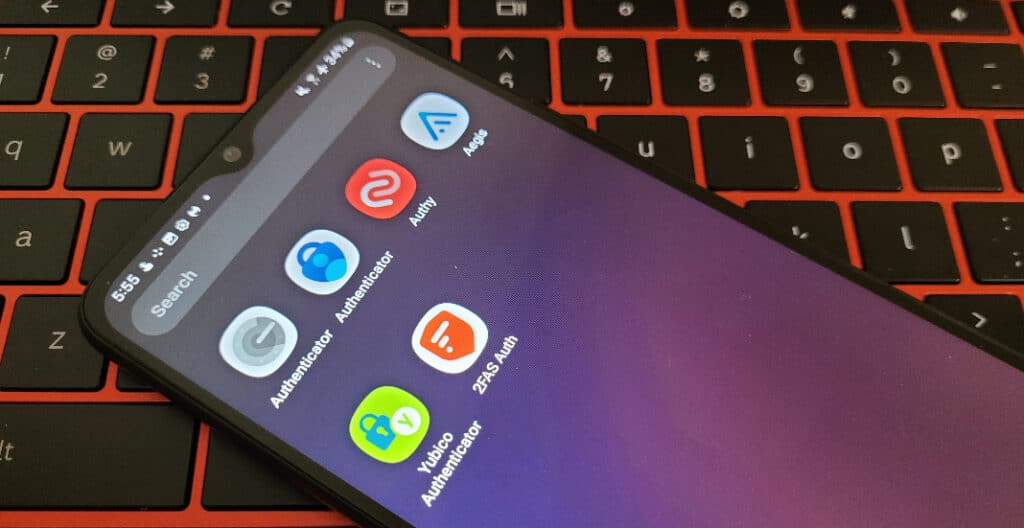
A quick search on Google Play or the App Store reveals a huge variety of authenticator apps to choose from. Three of the most popular and well known are Google Authenticator, Microsoft Authenticator and Authy.
However, less well-known options have been growing in popularity, including 2FAS, Aegis (Android only) and Raivo (iOS only). (Update Aug 8th: Raivo has been acquired, leading to privacy concerns.)
Additionally, 1Password and Bitwarden, well known password managers, have built in authenticator apps. These are very convenient as their browser extensions can fill in the 2FA codes for you. However, using your password manager as your authenticator means hackers will have not just your passwords but also your 2FA codes if they breach your password vault.
All the authenticators I just mentioned are free, except for 1Password’s and Bitwarden’s. However, the cost of these authenticators includes top tier password managers as well.
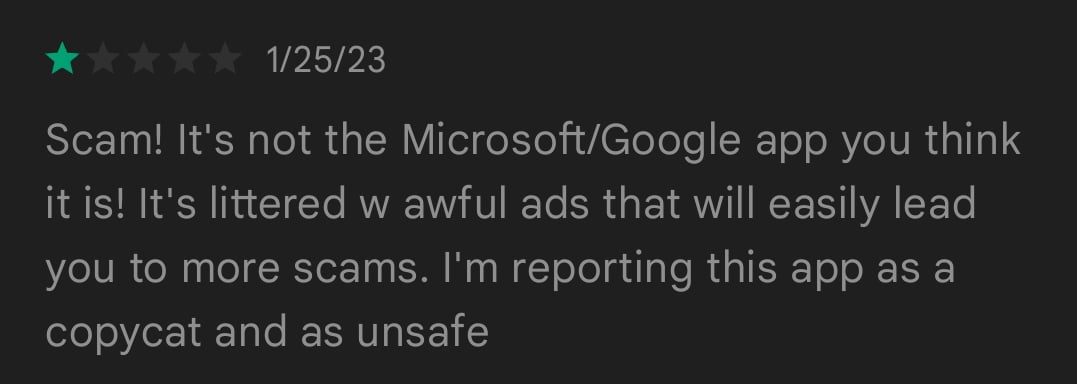
You need to watch out for scam apps while browsing for authenticators, however. Fake authenticators can steal your codes, display annoying ads, or ask you to purchase an expensive subscription. Worse, these scam apps sometimes buy ads so they appear at the top of the search results. So double check the reviews before you download anything!
To help you decide which authenticator is best for you, I’ve compiled a list of some of the most popular apps and indicated whether they have the following desirable features:
- Backups: Many authenticators give you a way to back up your data so you can recover your 2FA codes if your phone gets lost or you upgrade to a new device.
- Sync: Some authenticators allow you to install their app on multiple devices and keep them in sync, so if you add an account on your phone, the codes are also available on the desktop app, for example.
- Unlock protection: Many authenticators allow you to lock the app (e.g. with a pin code or biometrics) to prevent someone accessing your 2FA codes if they steal your unlocked phone.
- Open source: The code for some authenticators is freely available for anyone to look at, increasing trust in the app.
- Secret key export: Some authenticators allow you to export your secret keys, which are used to generate your 2FA codes. This makes it easy to switch authenticator apps, as you just need to add the secret keys to the new app and you’ll be ready to go.
You’ll definitely want to make sure your authenticator handles backups in a way you’re comfortable with, since backups allow you to keep your authenticator data if you need to change your phone. Cloud backups are very convenient, but some people prefer to make local backups themselves for maximum security.
Authy is probably a good choice of authenticator for people who value convenience because it makes backups so easy and has apps for every operating system (yes, including your desktop!). Update April 19th 2024: Authy has discontinued support for its desktop apps. This, together with the inability to export your 2FA codes from Authy, means I no longer recommend it. If you’re looking for an authenticator that’s convenient and easy to use plus has desktop apps, check out ente Auth instead.
How do I use my authenticator app?
Once you’ve chosen your authenticator, it’s time to get it set up! I’ll go over how to add accounts to your authenticator app and how to log in once your accounts are linked to it, using Microsoft Authenticator and Twitter as an example. I’ve also written a separate post about how to set up and use 1Password’s authenticator.
How do I add an account to my authenticator?
To add an account to your authenticator app, you’ll first need to make sure you’re logged in to the account you want to add and have found the two-factor authentication settings. These will usually be somewhere in the security settings, but the exact location will vary depending on the service you use.
For example, to find the two-factor settings for your Twitter account on the web, you need to click “more,” “Settings and Support,” “Settings and Privacy,” “Security and account access,” “Security,” and then “Two-factor authentication.”
If there are a few different two-factor authentication methods to choose from, you’ll want to select “authenticator app.” Don’t worry if a site only lists “Google Authenticator” as an option — you should still be able to use your authenticator app of choice.
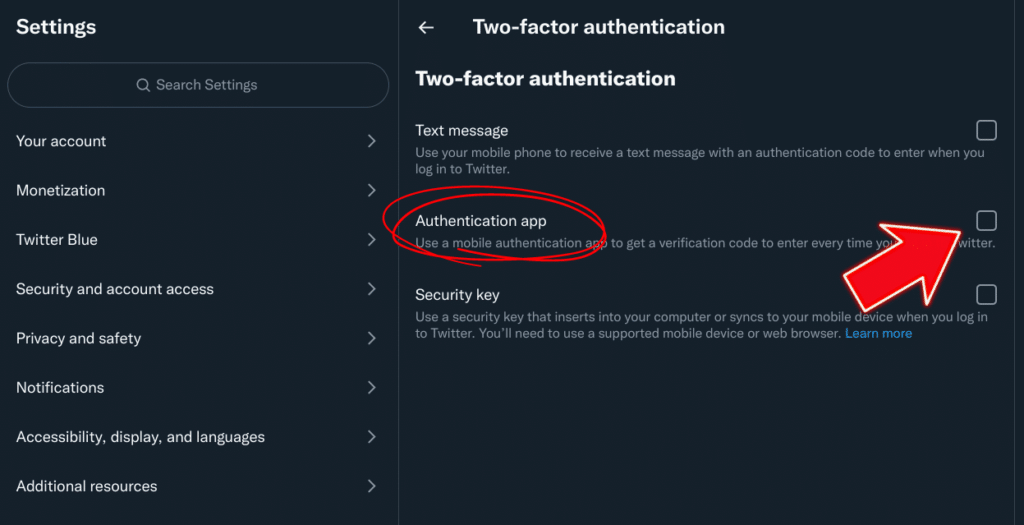
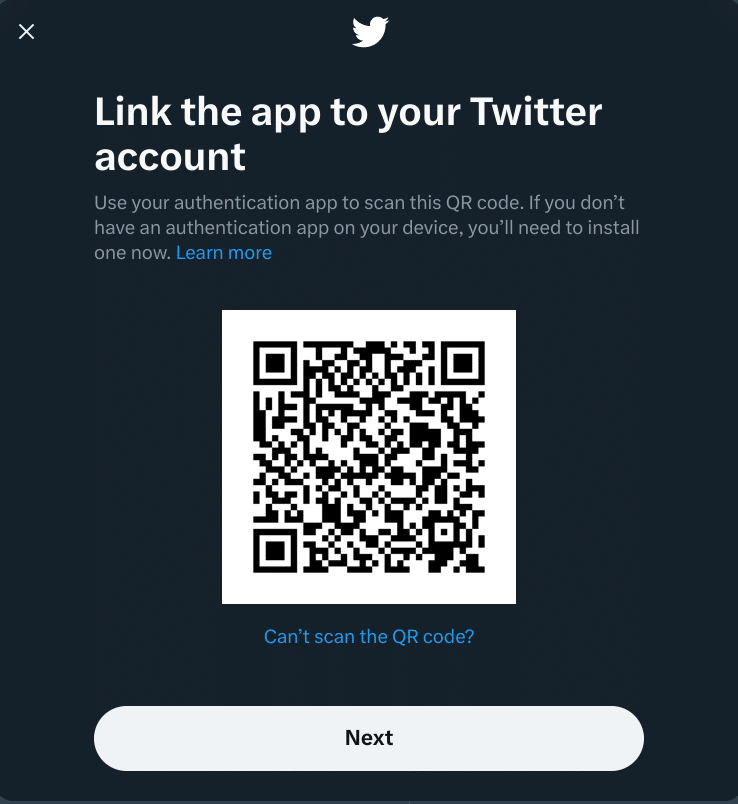
Once you tell the service you want to link an authenticator to your account, it will display a QR code. You’ll need to scan this with your authenticator app.
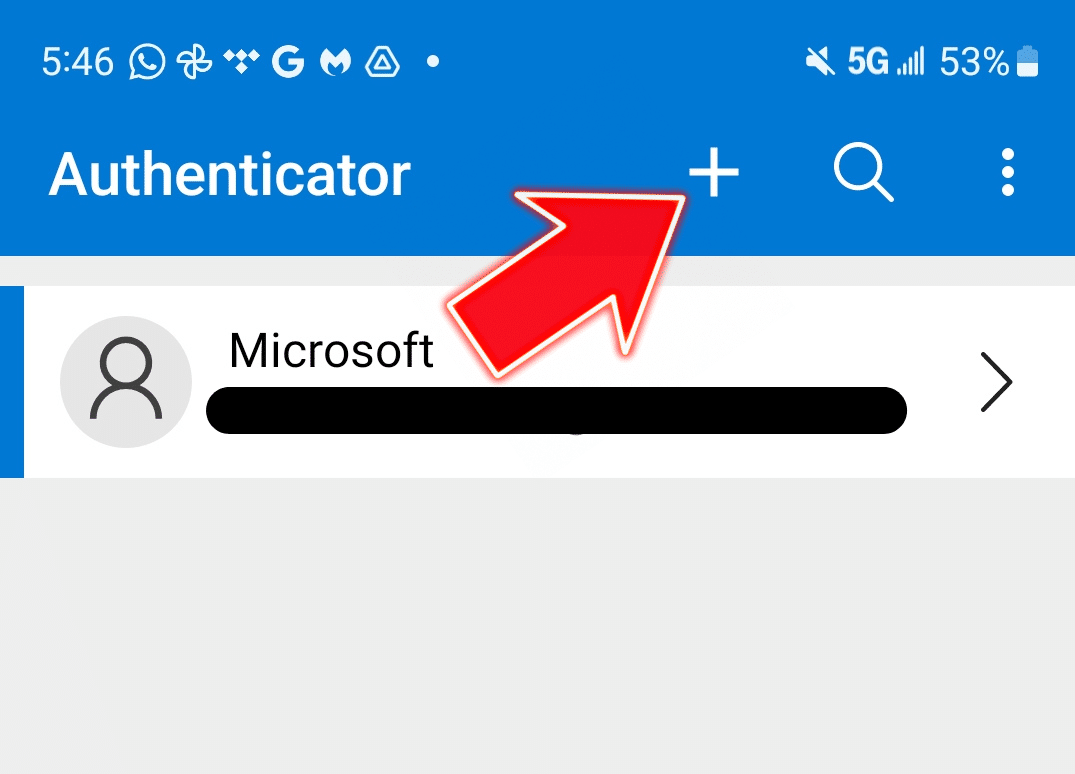
To do this, open your authenticator and look for the option to add an account. In Microsoft Authenticator, you’ll need to click the plus sign at the top and select the kind of account you want to add: a personal Microsoft account, a school or work Microsoft account, or a different account. As I’m going to add my Twitter account in this example, I selected “Other account.”
Your authenticator will then open up a camera you can use to scan the QR code. Put the code in view of the camera and the app should automatically scan it.
If the scan doesn’t work, don’t worry, as you can add it manually instead. To do this, look for a message on the same screen as the QR code that says something like “Can’t scan the QR code?” Clicking on it will bring up the secret key, which is a long alphanumeric code.
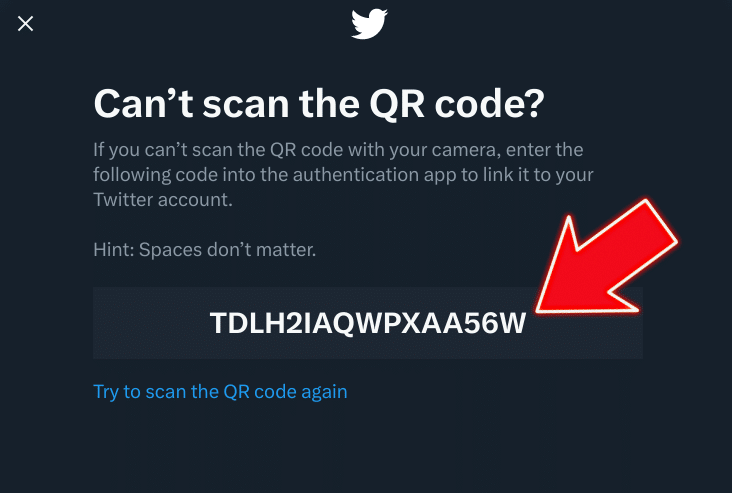
Next, in your authenticator app, you should see an option to add an account manually. In Microsoft Authenticator, for example, this option appears at the bottom of the camera screen. Click on it and you’ll be able to enter your account name and the secret key, which will add your account to the authenticator without the need to scan the QR code.
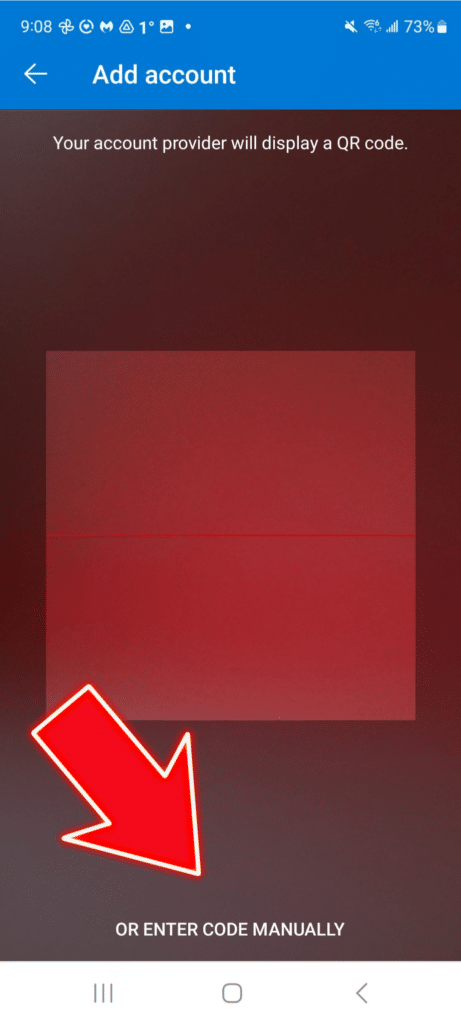
Next, whether you’ve scanned the QR code or entered your secret key, you’ll need to enter a code generated by your app back into the website your account is with. This confirms everything works correctly. Once you’ve done that, 2FA with an authenticator app will be enabled on your account!
At this point, many websites, Twitter included, will generate backup codes for you. These codes can be entered in place of a code generated by your authenticator app, allowing you to log in to your account if you lose your phone and can’t access your authenticator. So write them down and store them somewhere safe in case you have a 2FA emergency!
How do I login using an authenticator?
Logging in to an account protected by an authenticator is just like the last step of the setup process, where you had to enter a code from the app into the website.
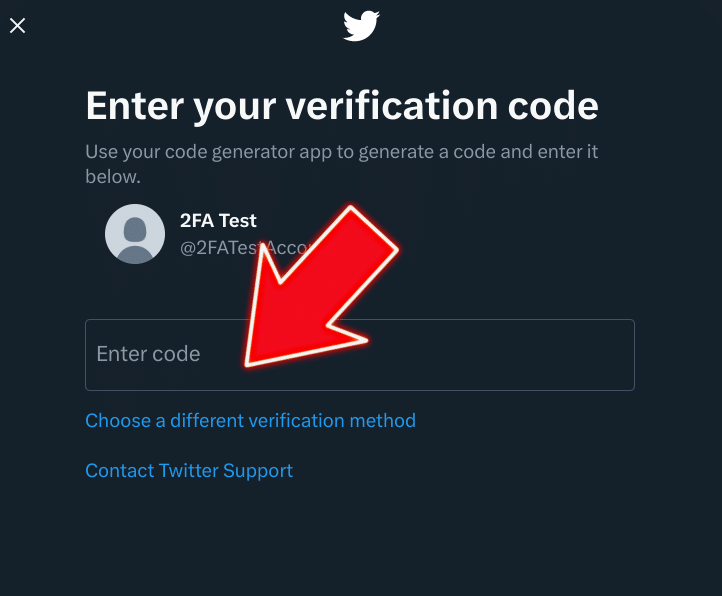
You’ll first enter your username and password, as usual, then the website will prompt you for a code from your app. So you’ll need to open the app, find the code generated for your account, and type it into the website. Once you’ve done that, you’ll be logged in. Easy!
How do I backup and restore my authenticator data?
To avoid getting locked out of your accounts if you lose your phone or get a new one, you’ll want to set up backups for your authenticator. The way you do this differs depending on the authenticator app you chose. The best way to find instructions for your app is to search for “[Name of your authenticator app] backups.” Here we’ll look at enabling backups for the Microsoft Authenticator Android app.
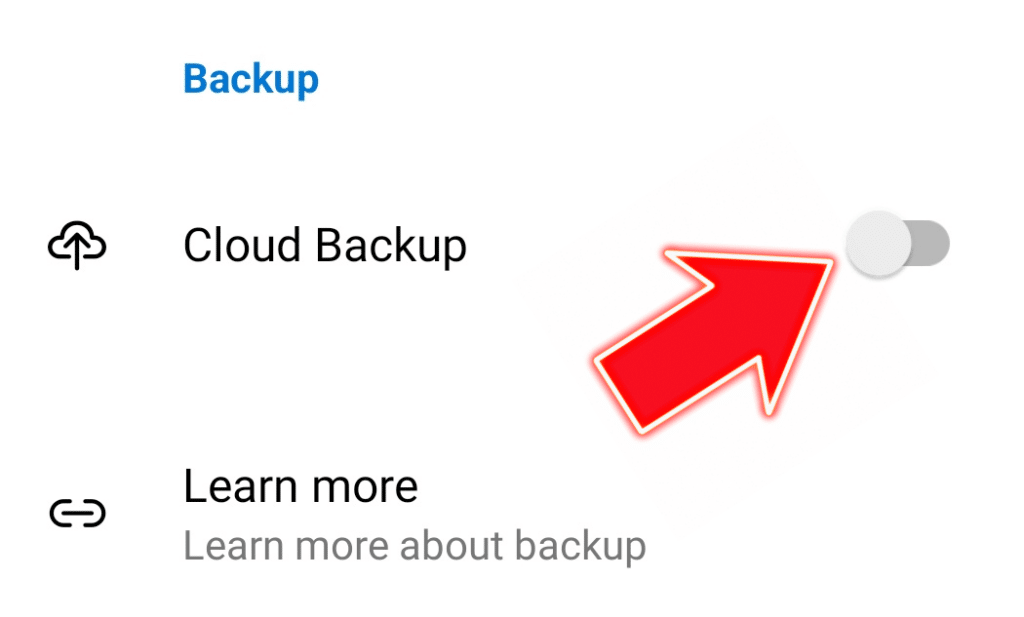
To set up backups, open Microsoft Authenticator and touch the three dots on the top right of the screen to open up the menu. From there, select “Settings” and enable the “Cloud backup” option. You’ll need to sign in to your personal Microsoft account (you’ll also need an iCloud account if you’re using the iOS app) and then the backup will happen automatically.
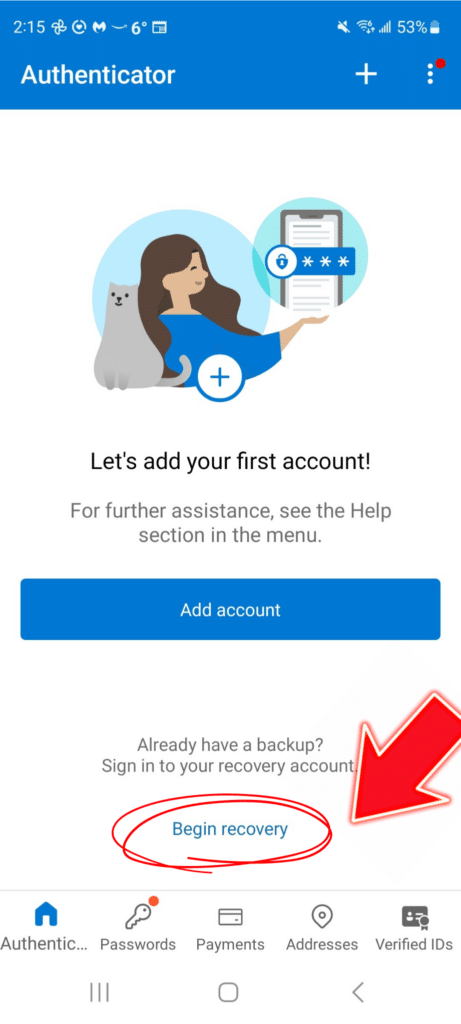
If you lose or break your phone, you can install Microsoft Authenticator on a new device and begin the recovery process to restore your authenticator data. To do this, open the app and look for the “Begin recovery” option. When you click this, you’ll be prompted to log in to the Microsoft account you used to set up your backups.
After entering your username and password, you may need to verify your identity in an additional way. So before you need to restore a backup, make sure you have a good way to authenticate yourself. Otherwise, you might end up locked out of your account and your authenticator backups.
Once you’ve confirmed your identity, Microsoft will begin the recovery process automatically! If it’s successful, you’ll see your accounts reappear in your authenticator.
Unfortunately, there is one case where you won’t be able to restore your backup: when you’re switching platforms. In other words, if you’re using the Android app and want to switch to an iPhone or if you’re using the iPhone app and want to get an Android phone, then Microsoft Authenticator’s restore function won’t work.
In these cases, you’ll need to make sure you keep your old phone, log in to your accounts and temporarily turn off 2FA. Once you’ve installed Microsoft Authenticator on your new phone, you can go through the process to set up authenticator-based 2FA on your accounts again.
Why aren’t my authenticator codes working?
If you try to log in to your online accounts but keep getting messages telling you your authenticator codes are incorrect or expired, the time on your phone may be causing the problem.
That’s because the codes generated by authenticator apps are time-based, so if the time on your device is wrong, they won’t be accepted when you try to log into your accounts.
I tested this myself by changing the time on my phone so it was 5 minutes fast and, sure enough, when I tried to log in to my Twitter account, it told me my authenticator code was incorrect.
Fortunately, there is an easy fix! Head to the settings in your phone and search for “time and date.” Then make sure “Automatic time and date” is enabled.
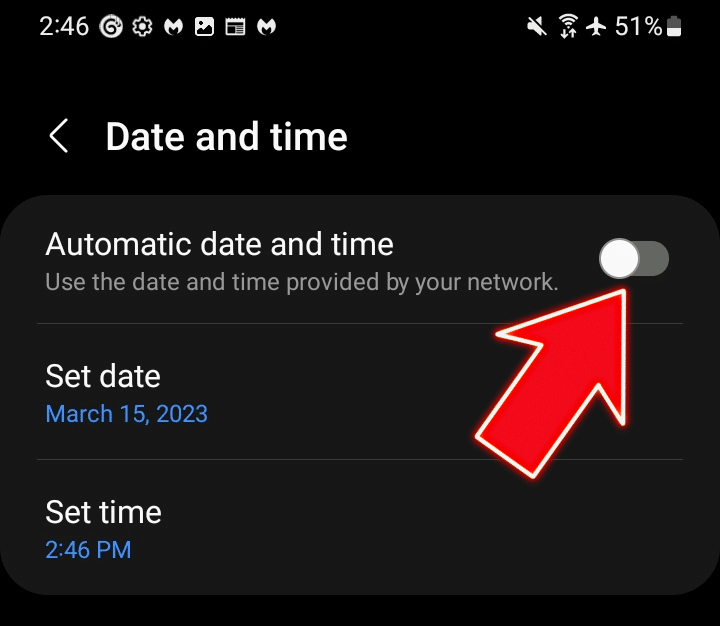
Re-enabling that setting fixed my authenticator codes and allowed me to log back in to my Twitter account again! Phew!
Authenticator app alternatives
If you’ve read through this guide and still think authenticator apps aren’t for you, are there any alternatives you can use?
We’ve already seen text-based 2FA has significant security and privacy issues, but it is better than no 2FA at all. So if you just can’t stand authenticators, turning on text-based 2FA is better than turning it off completely.
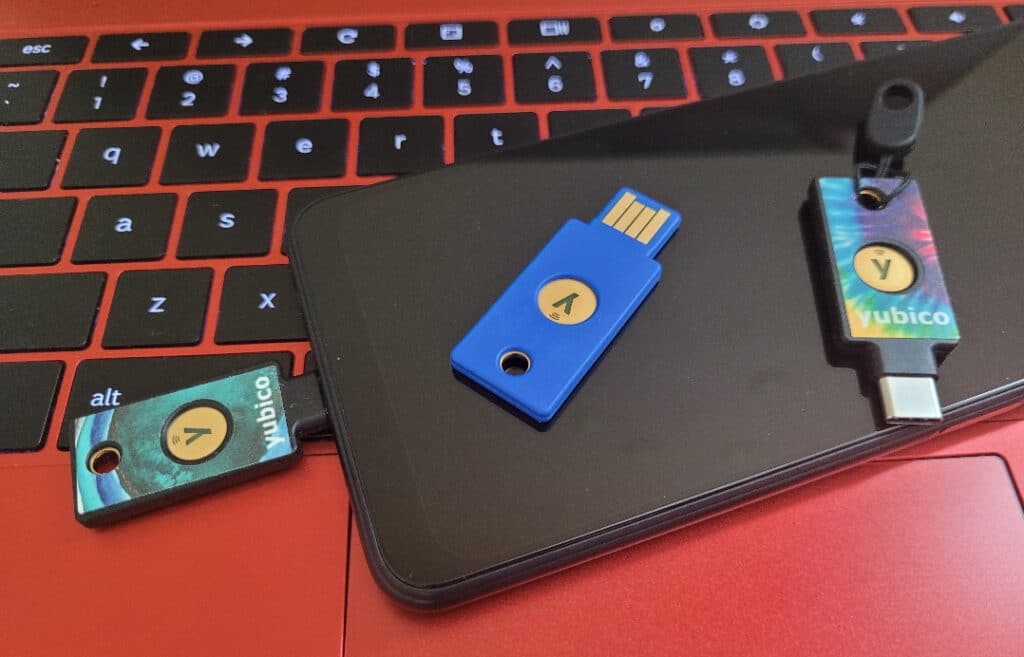
However, there is another option you could consider: security keys. These are little devices that look like USB thumb drives. You plug them into your computer or phone and tap a little button on them to verify your identity.
Security keys are the most secure form of 2FA you can get. Unfortunately, not all sites offer 2FA with security keys yet, but support for them is becoming more widespread. For example, earlier this year Apple announced you can now use them to protect your Apple accounts.
If you want to know more about security keys, you can check out my guide here.
The takeaway
While it takes a bit of time and effort to set up an authenticator, using it soon becomes second nature. And that time and effort is absolutely worth it for the improved protection it offers your accounts.
