Last updated on July 24th, 2023 at 02:20 pm

Turning on two factor authentication (2FA) is a great way to keep your accounts secure. But what is 2FA? How does it protect your accounts? And how do you set it up? This post will answer these questions as part of our beginners’ guide to 2FA. Let’s get started!
What is 2FA?
When you log in to an account with your username and password, your password is used to verify you are who you say you are. As your password is something you know, it’s an example of what’s called a knowledge factor of authentication. PIN numbers, like the one you enter when using your debit card, and security questions are other forms of knowledge factors that can be used to verify your identity.
But there are ways of verifying you are who you say you are without relying on something you know. One method is to use something you have, also called a possession factor, like your phone. You can prove you’re really you by, for example, providing a code sent to you via text message. Another example of a possession factor is a security key, like a Yubikey, which is a physical device made specifically for verifying your identity.
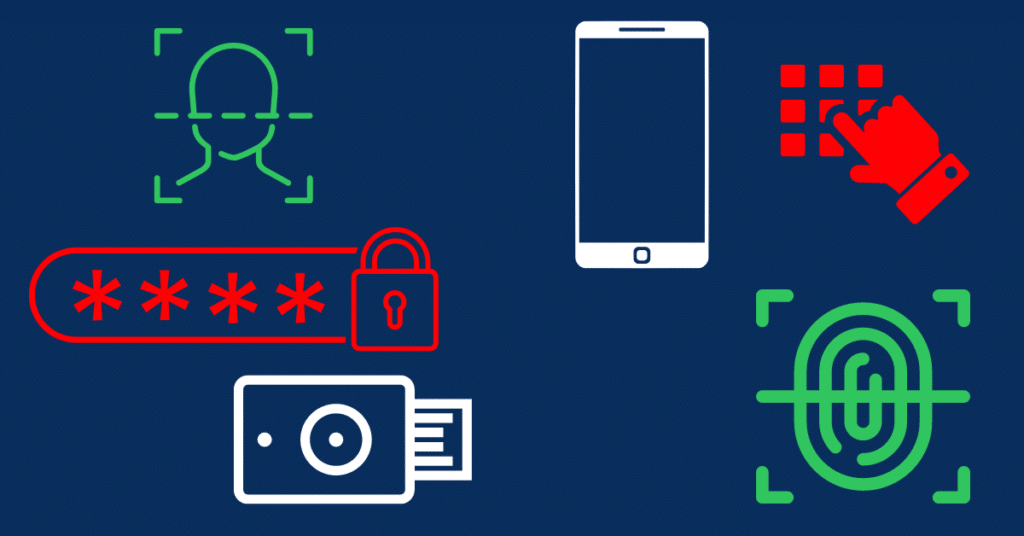
An alternative way of proving you’re the real deal is to use something that you are, called an inherence factor, like your fingerprint. You can, for example, scan your finger with your phone’s fingerprint scanner to prove you’re not an imposter. Your face and even your retina can also be used as inherence factors.
2FA combines two of these different ways of verifying your identity. It requires you to use two authentication factors of different types to log in, for example, your password and a code texted to your phone. That’s why it’s called two-factor authentication.
The authentication factor you use in addition to your password, e.g. your phone, is often called your second factor. Which specific combination of factors you’ll use to log in depends both on the methods supported by your account and your own preferences.
How does 2FA protect my accounts?
These days, securing your account with just a password, even a good password, leaves it vulnerable. That’s because there are many ways for a cybercriminal to figure out what your password is, giving them access to your account and all your data unless you’ve enabled 2FA.
For example, criminals could hack into a company, steal the usernames and passwords of its customers, and sell them on the darkweb. Cybercriminals everywhere could then access any accounts where you’ve used those credentials if you haven’t set up 2FA.
But, with 2FA enabled, the cybercriminals would be blocked from getting into your accounts because they don’t have your second factor.
2FA doesn’t mean your account is completely hacker-proof, though, as smart criminals are finding ways to bypass the protection it provides. But it does make breaking into your account much more difficult. In fact, a 2019 report by Microsoft found 2FA can prevent 99.9% of attempts to break into your accounts.
How do I set up 2FA?
Before you can set up 2FA, you’ll need to check that the service you use supports it. You can do this by going to 2fa.directory, clicking on the category your service belongs to, e.g. email or backup and sync, and looking for it on the list that appears.
If the service you use is highlighted in green, 2FA is available in some form for your account. But if it’s highlighted in red, the service doesn’t support 2FA. In that case, consider contacting the company to ask them to make 2FA available so you can keep your account secure.
If 2FA is available for your account, how do you turn it on? Usually, you’ll find 2FA options in the security settings of your account, though the exact steps you’ll need to take will differ for each service. You’ll likely find specific instructions by searching for “name of service” and “2FA” in your favorite search engine.
To give you a better idea of what’s involved in setting up 2FA, we’ll look at how to turn it on for Twitter.
Once you’re logged in to your Twitter account, look on the left-hand side and click on “More,” followed by “Settings and support,” and “Settings and privacy.” Then select “Security and account access,” “Security” and finally “Two-factor authentication.”
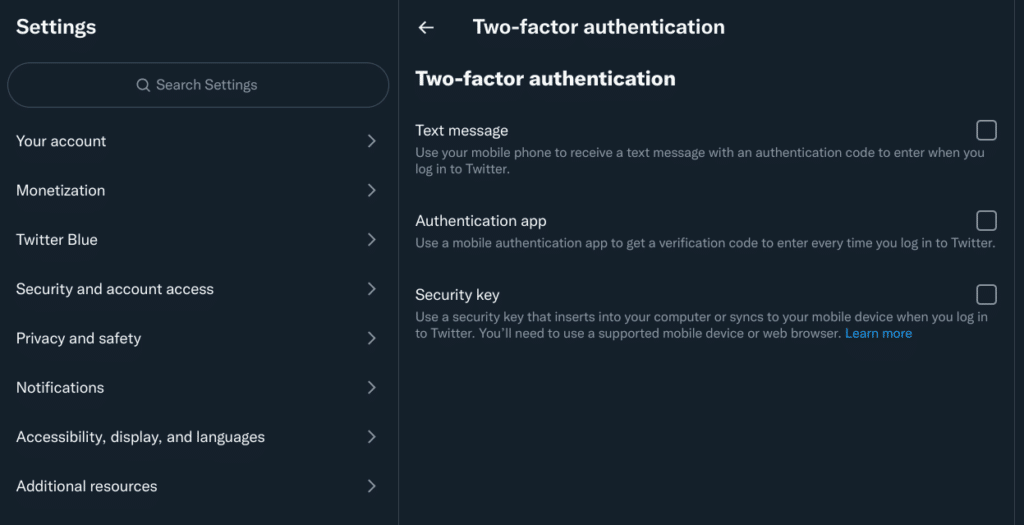
You’ll then see three 2FA options you can choose from: text message, authenticator app or security key. These are three of the most common options offered by most services. Two others that you sometimes see are email-based and push-based 2FA. Email-based 2FA sends you a code via email that you enter when you log in, while push-based 2FA generates a notification on your phone that you must approve.
Let’s look at each of the 2FA methods Twitter offers in more detail. We’ll see what’s involved in setting up each method, what the log in process looks like once it’s enabled, and the pros and cons of each method.
Text message
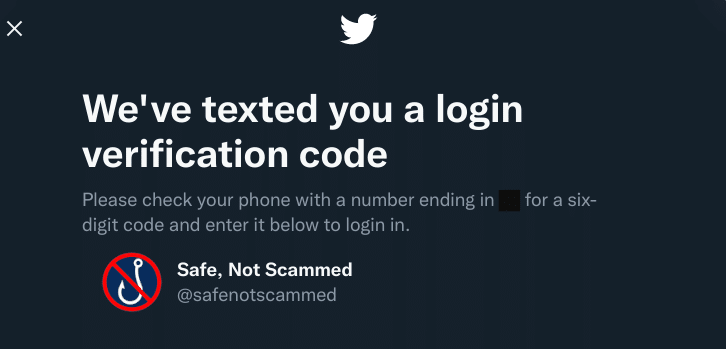
Set up: Twitter will ask for your phone number and then send you a code. You’ll need to enter the code to confirm your number and then 2FA will be enabled on your account.
How you log in: After you enter your username and password, you’ll be sent a text that contains a one-time code. You then just need to enter that on Twitter’s website to finish logging in.
Pros: Receiving codes via text is familiar and you don’t need to learn any new technology.
Cons: Receiving 2FA codes via text is not as secure as other methods. 2FA codes sent via text can be stolen in SIM-swapping attacks and via phishing.
Authenticator app

Set up: You’ll first need to download an authenticator app onto your phone. Popular authenticators include Authy, Microsoft Authenticator and Google Authenticator, which are all free, and can be found on Google Play or the App Store.
Twitter will then display a QR code, which you’ll need to scan with your newly installed authenticator. The app will then generate codes, with a new one appearing every 30 seconds. You’ll need to enter the current code into Twitter to confirm that your authenticator is set up correctly. Voila, 2FA is now enabled!
How you log in: After entering your username and password, Twitter will prompt you to enter the current code from your authenticator app. Once you’ve done that, you’ll be logged in.
Pros: Authenticator apps work even if your phone is offline, which can be handy if you’re traveling abroad and don’t have service. They are also more secure than receiving codes via text message as they are not vulnerable to SIM swapping attacks.
Cons: If you lose your phone, you can lock yourself out of your accounts if you haven’t prepared a backup in advance. Codes generated by an authenticator app are less secure than a security key because they can still be phished.
Security key
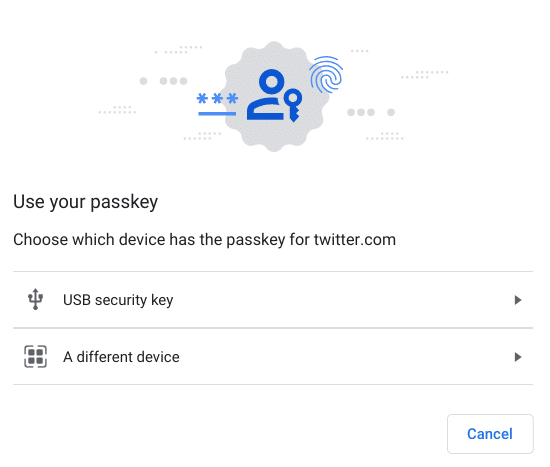
Set up: You first need to have a physical security key, which is a USB-sized device made for verifying your identity. Popular keys include Yubikeys and Titan security keys. Unlike authenticator apps, these are not free, with prices starting at around $25 for one key. Once you have a key, depending on the model, you’ll either insert it into one of your device’s ports or sync it using NFC. You’ll then just need to touch the button on the key to finish setting up 2FA on your account.
How you’ll log in: After entering your username and password, Twitter will prompt you to either plug in your security key or sync it via NFC. You then just need to tap the button on the key and you’ll be logged in.
Pros: Security keys are the most secure method of 2FA.
Cons: Security keys are not free, with prices starting at around $25 per key.
Don’t ignore this step
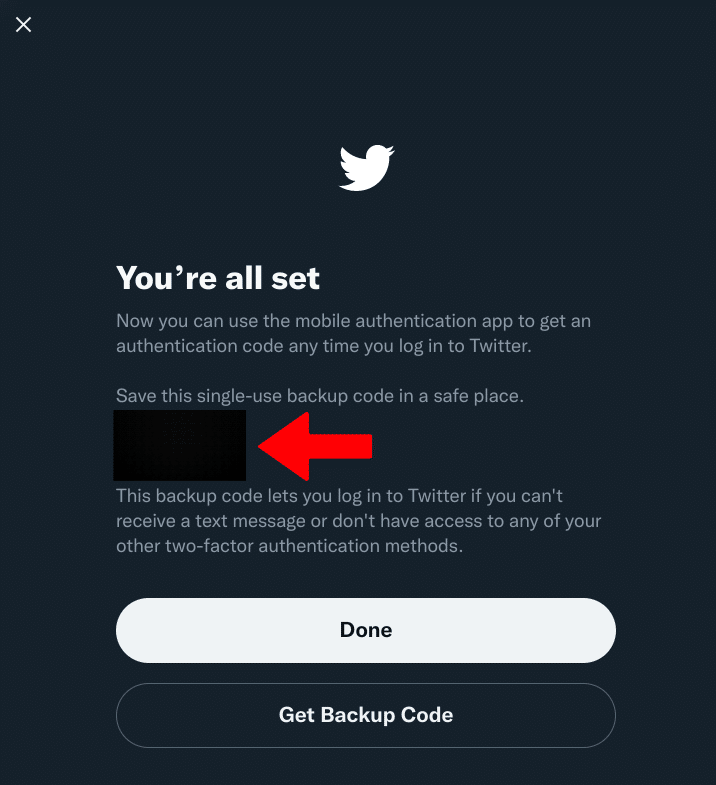
After you’ve decided which method of 2FA is right for you and have enabled it, Twitter will display a one-time passcode. DO NOT IGNORE IT! Instead, write it down and store it somewhere safe, like with your passport. If anything goes wrong with your 2FA and you find yourself locked out of your account, you’ll need that code to log back in.
Things to keep in mind
While any form of 2FA is better than none, receiving codes sent via text is the least secure. So, for high-value accounts, you’re better off using an authenticator or, for maximum protection, a security key. Unfortunately, it’s not always possible to use these more secure methods, as some companies, including many banks, only offer text based 2FA.
If you use an authenticator app, make sure you find out how to create a backup or switch it to a new device so you’re prepared in case you lose or upgrade your phone. Authy makes this really easy, as you can install it on multiple devices that are kept in sync with each other. Microsoft Authenticator allows you to create backups to your Microsoft account, but you have to enable them first. Google Authenticator recently introduced a backup and sync feature, but you can also create your own backup using the export account option.
Similarly, if you use a security key, consider setting up a backup key in case you lose your primary one. Unfortunately, there isn’t a quick and easy way to make a backup key. Instead, you’ll have to go through the setup process again with the backup key for each of your accounts.
The takeaway
Setting up and using 2FA on your accounts admittedly requires a bit of time and effort. But in return, your accounts will be so much more secure.
