Last updated on April 24th, 2023 at 11:55 am
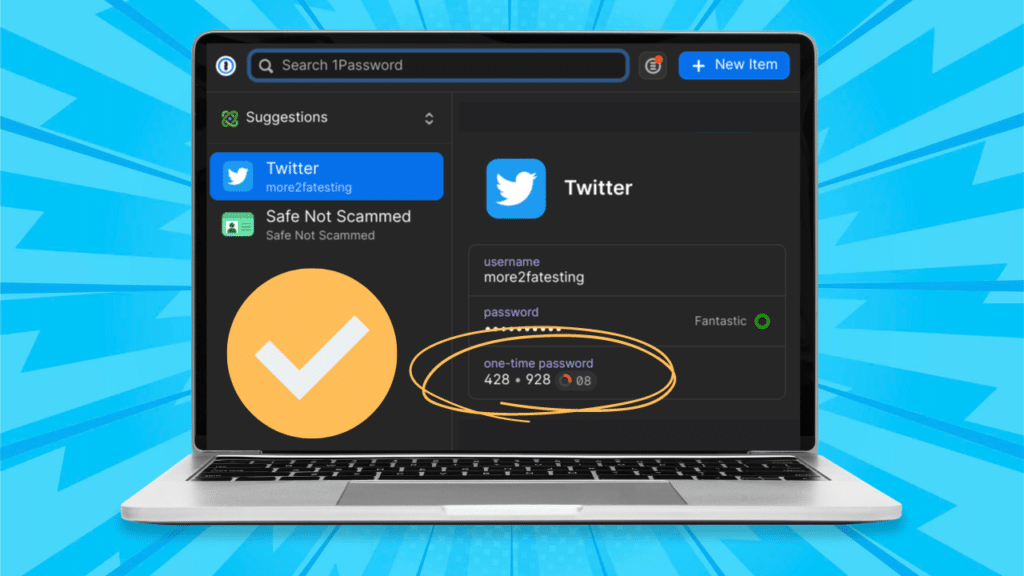
1Password is a password manager, but did you know you can use it to handle your two-factor authentication (2FA) needs as well? Well, you can! That’s because 1Password comes with its own built-in authenticator app.
In this post we’ll tackle whether it’s a good idea to use your password manager as an authenticator, before seeing how to set up and use 1Password’s authenticator. Let’s get to work!
Table of contents
- Should I use 1Password as an authenticator?
- Linking your accounts to 1Password’s authenticator
- Logging in using 1Password Authenticator
- Exporting your 2FA codes to another authenticator
- The takeaway
Should I use 1Password as an authenticator?
There are pros and cons to using 1Password as an authenticator.
On the one hand, it is super convenient because it autofills your 2FA codes for you the same way it does your passwords. You’ll also have your 2FA codes wherever you have 1Password installed, whether that’s on your phone, tablet, or desktop. Plus, your 2FA codes are backed up in the cloud, so you won’t find yourself locked out of your accounts if you lose your phone.
On the other hand, using 1Password as an authenticator means anyone who gains access to your 1Password account has everything they need to break into all your other online accounts. So you are putting all your security eggs in one basket to some extent.
You’ll need to decide for yourself if the pros of using 1Password as an authenticator outweigh the cons for your own situation. You can check out my previous post for a more detailed discussion of these pros and cons as well as some suggestions for reducing the risk of using your password manager as an authenticator.
Linking your accounts to 1Password’s authenticator
If you decide to use 1Password as your authenticator, you’ll first need to link your accounts to it. You can do this either by scanning a QR code or manually entering a secret key generated by the account you’re linking. I’ll use Twitter as an example in what follows.
You can watch my YouTube video to see how to set things up, or just scroll past if you only want the written instructions.
To get the QR code or secret key, you’ll need to head to the 2FA settings for the account you want to link to 1Password’s authenticator. Once there, look for the authenticator option (don’t worry if it only lists Google Authenticator—you’ll be able to use 1Password’s authenticator instead).
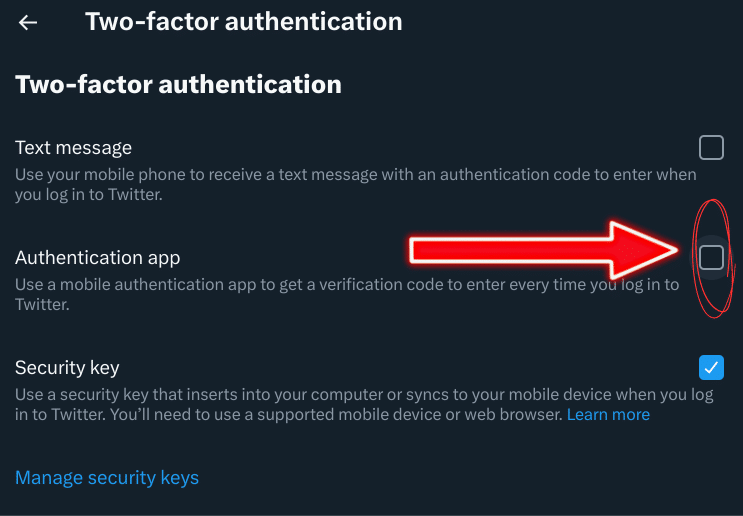
You can then link your account to 1Password’s authenticator using either the browser extension or mobile app.
Linking your account to 1Password’s authenticator via the browser extension
To use the browser extension to link your account, make sure you’re on the page where the QR code is displayed.
Then click the 1Password extension. It should bring up your details for the site you want to link. If you have multiple accounts with that site, you can select the correct one from the left-most panel.
Next you’ll want to click the three dots on the top right. Then select the “Scan QR code” option. If all goes well, you should now see a code in the one-time passcode entry for that site.
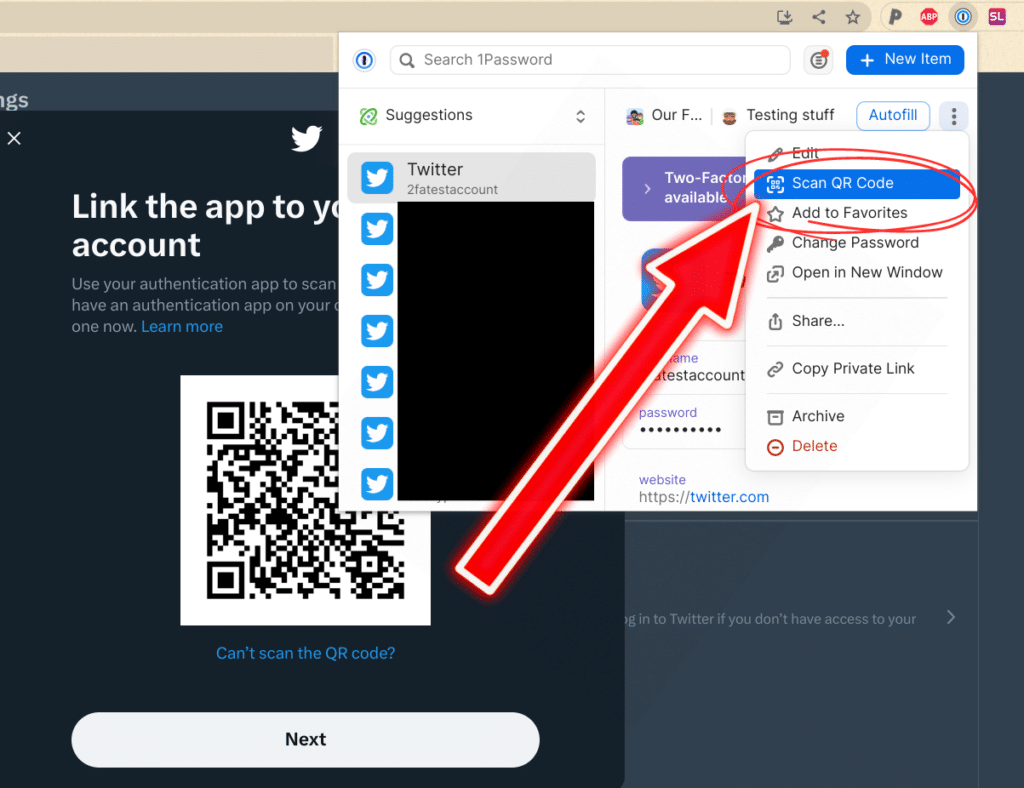
If something goes wrong and scanning the QR code doesn’t work, don’t worry. Look for a link on the page with the QR code that says something like “Can’t scan the QR code.” Clicking that should bring up the secret key, which is a sequence of letters and numbers. You’ll then need to add this to 1Password manually.
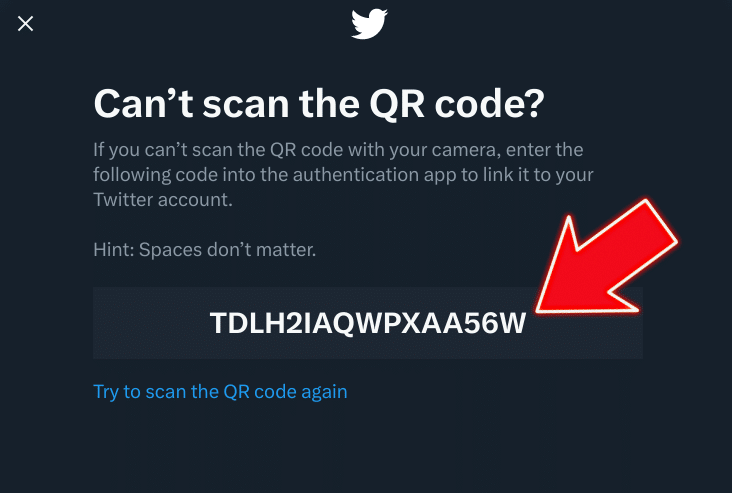
To do this, copy the secret key to your clipboard. Then, click on the three dots in the top right of the 1Password entry for your account and select “Edit.” You’ll be taken to the entry in your vault on 1Password.com.
Then, click the gray dots next to one of the spaces with the “new field” label and select “one-time password.”
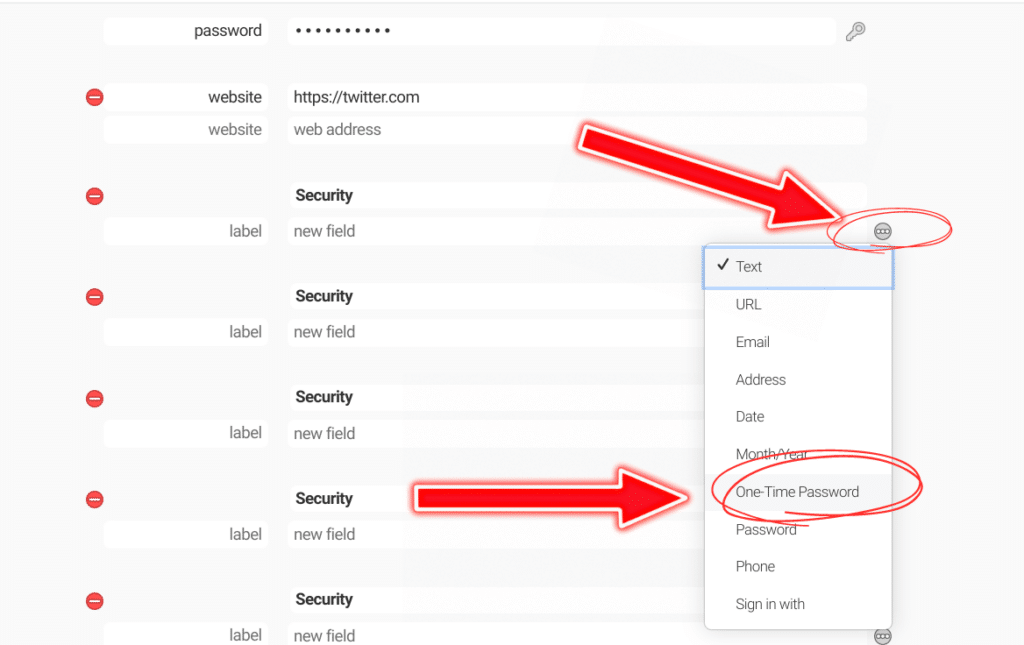
Paste your secret key into that field and save your entry. You should now see a one-time passcode in that field.
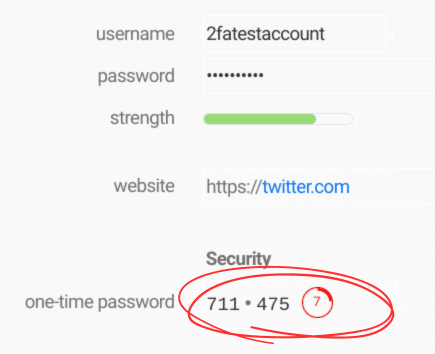
Whether you scanned a QR code or entered a secret key, you’ll now need to confirm that the 2FA codes generated by 1Password are correct. On the page displaying the QR code or secret key, look for a button that says something like “Next” or “Continue.” Click it and you should be asked to enter the current 2FA code generated by 1Password.
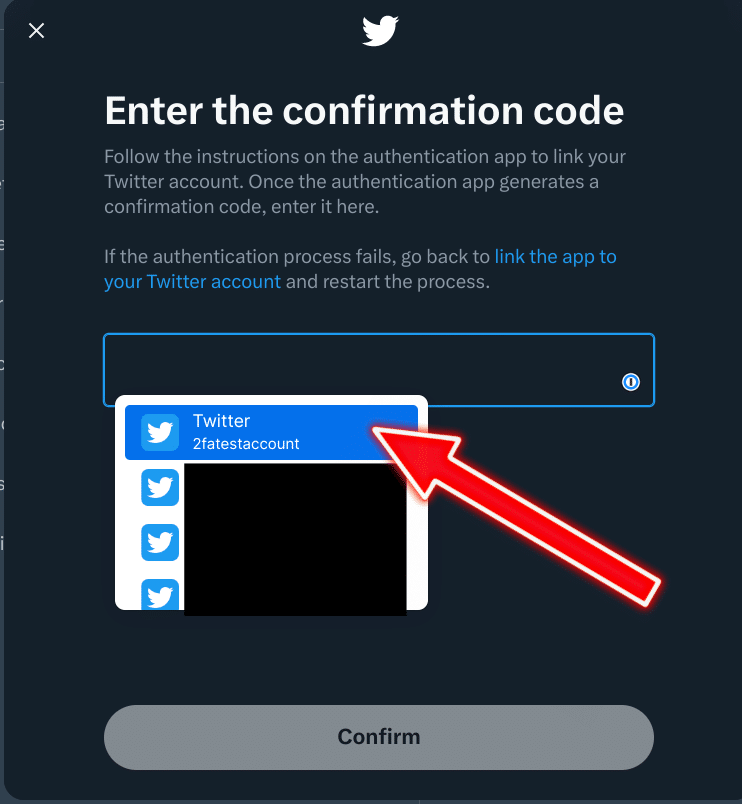
Once you’ve done that, your account will be linked with 1Password’s authenticator and protected with 2FA. You should save backup codes if your account is with a site that supports them. That way, if anything goes wrong with your 2FA, you won’t find yourself locked out of your own account.
Linking your account with 1Password’s authenticator via the mobile app
How you link an account to 1Password’s authenticator using the mobile app depends on whether you’re accessing the account on the same device as the mobile app or not.
Accessing the account on the same device as the 1Password app
If you are accessing the account on the same device as the mobile app, you’ll need to link the account by using a secret key and not a QR code. This means that if the app or site you want to link displays a QR code, you’ll need to look for a link that says something like “Can’t scan the QR code?” to display the secret key instead.
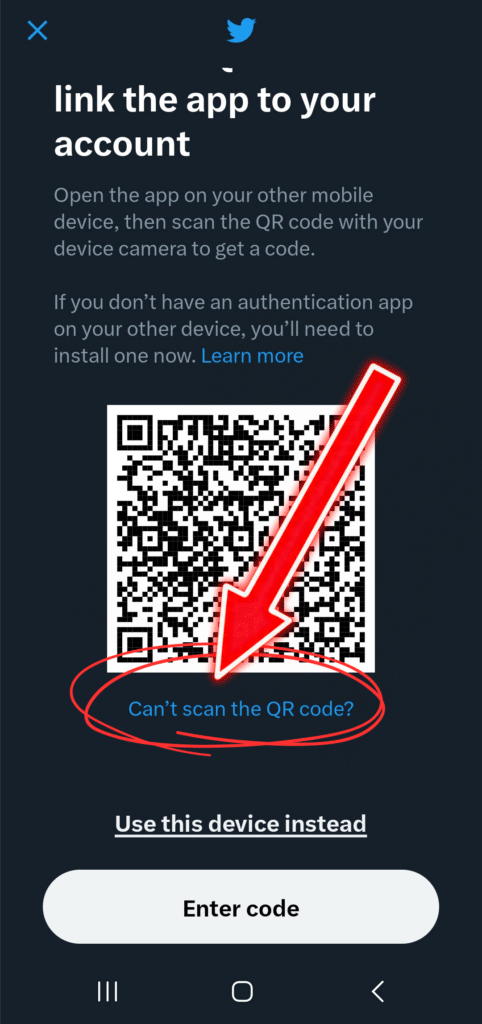
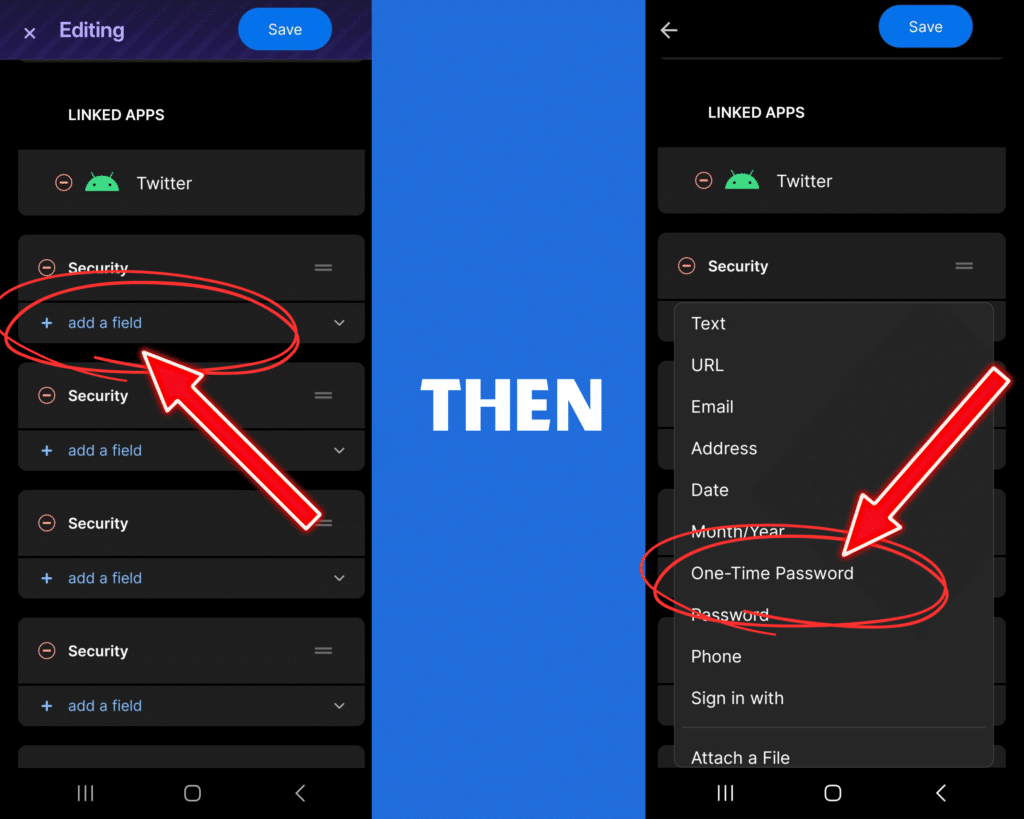
Once you’ve found the secret key, open the 1Password app. Find the entry for the account you want to protect with 2FA and select “edit.” Next, tap “add a new field.” Then select “one-time password.”
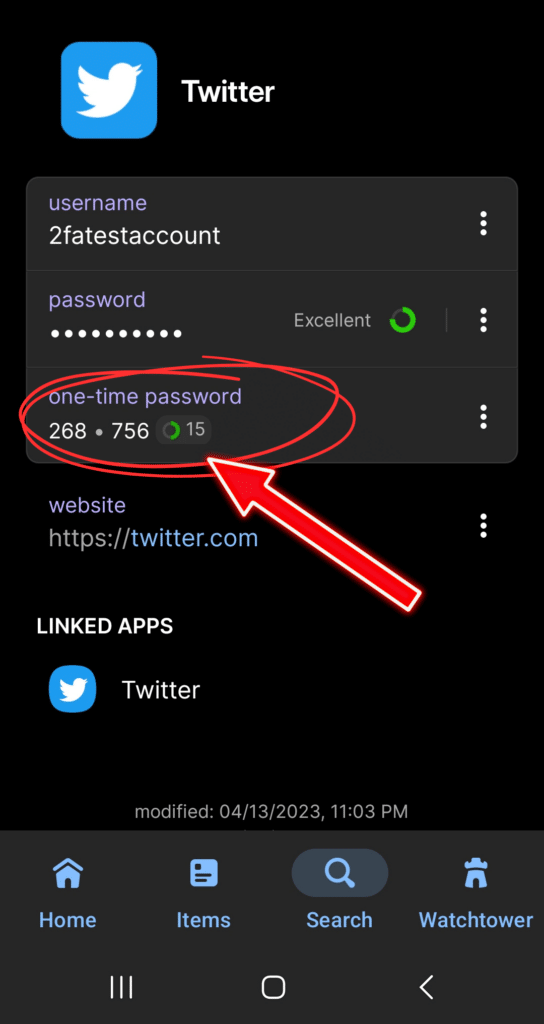
Then paste (or type) your secret key into that field and save your entry. You should now see a one-time passcode in that field. Tap on that passcode to copy it to your clipboard.
Then head back to the window displaying the secret key and look for a button that says something like “Confirm” or “Next.” Upon tapping it, you’ll be asked to enter the code generated by 1Password to ensure that your account is correctly linked to the authenticator. So, paste the code you just copied into that field and select “confirm.” (If the code is not accepted, it has likely expired, so head back to 1Password to copy a fresh code.)
Your account will then be linked to 1Password’s built-in authenticator. Don’t forget to save your backup codes if your account offers them to ensure you don’t get locked out if there is ever an issue with your 2FA!
Accessing the account on a different device from the 1Password app
If you are accessing the account you want to link to 1Password’s authenticator on a different device from the mobile app, first make sure you have the QR code ready.
Next, open up the 1Password mobile app. Look for the entry for the account you want to protect with 2FA, then click “edit.” Then tap “add a new field” and select “one-time password.”
Next, click the QR code button to the right of the one-time password field. This will open up a camera—point it at the QR code and it will scan the details into 1Password.
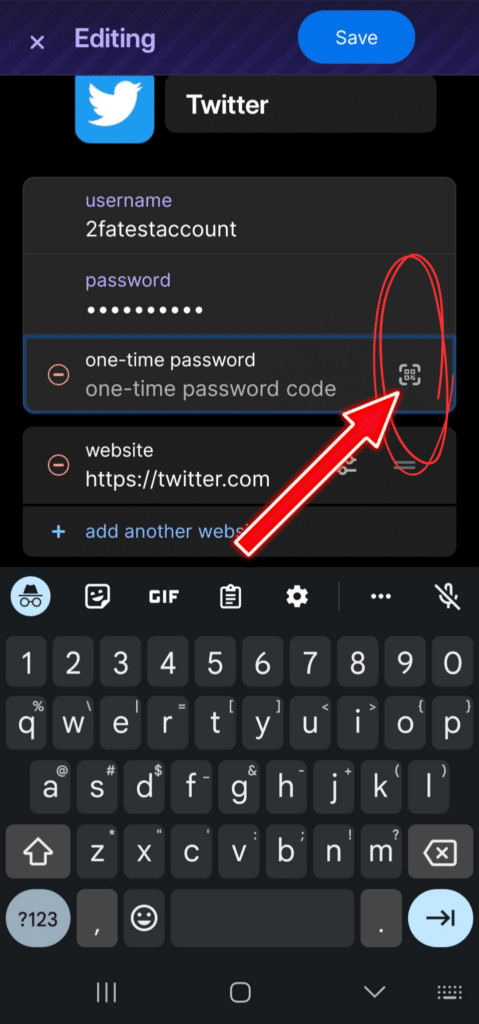
If the scan works, you should see a string that looks something like otpauth://…. in the one-time password field. You’ll then need to save the entry and 1Password will start generating your 2FA codes.
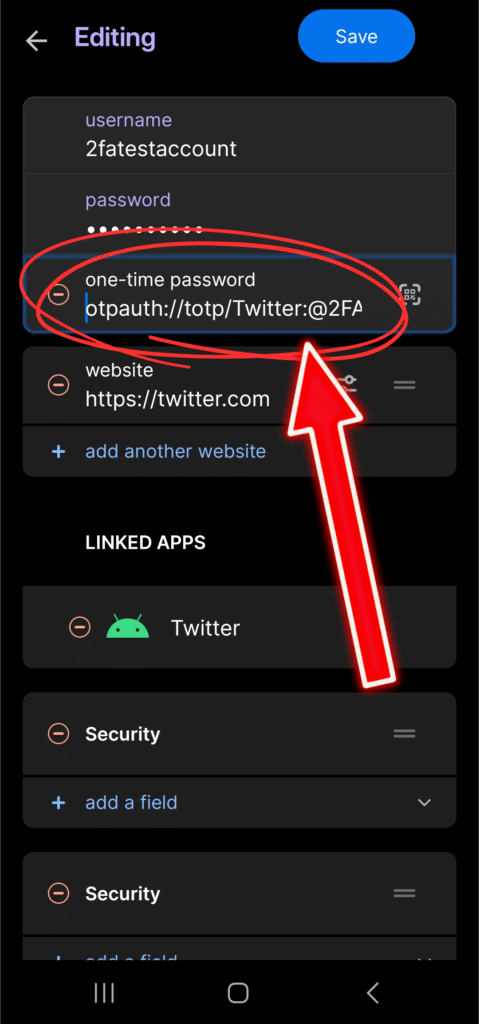
If there’s a problem, don’t worry. Instead, look for a link on the page displaying the QR code that says something like “Can’t scan the QR code?” It should then bring up the secret key instead. You can then type this into the one-time password field in your 1Password app and then select “Save.”
On the page displaying the QR code or secret key, click “Confirm” or “Next” to check your account is properly linked to 1Password. Here, you’ll need to enter the most recent 2FA code generated by 1Password.
Once that’s done, your account will be protected with 1Password’s authenticator. If your account supports them, make sure to save your backup codes somewhere safe in case you ever have a 2FA emergency.
Logging in using 1Password Authenticator
1Password makes logging in to your accounts super easy, even when protected with 2FA. Here’s how you log in using the browser extension and mobile app.
Logging in using the browser extension
First, make sure your 1Password browser extension is unlocked. Then, when you visit the site you want to log in to, select the correct account from the drop down list. 1Password will then autofill your username and password. And when you’re asked to enter your 2FA code, 1Password will autofill that, too. Super easy!
Logging in using the mobile app
To get started, unlock your 1Password mobile app and head to the site you want to log in to. Next, enter your username and password. The mobile app can do this for you if you’re logging in on the same device the app is installed on.
You’ll now need to enter your 2FA code. If you’re logging in on a device that has the 1Password app installed, it will copy the 2FA code to the clipboard for you, so you just have to paste it in and go. That’s all there is to it!
If you’re logging in on a different device, you’ll need to open up the entry for the account on the 1Password app to view the 2FA code. You can then type it in manually on the site and you’ll be logged in. Simple!
Exporting your 2FA codes to another authenticator
Unlike other popular authenticator apps, 1Password allows you to export your 2FA codes, which makes it easy to add them to a different authenticator. This is helpful if you decide you no longer want to use 1Password’s authenticator or if you just want to store your codes in an external authenticator as a backup.
You can check out my video walkthrough on exporting your 2FA codes below, or just scroll past if you just want the written instructions:
To export the 2FA codes for an account, you’ll need to go to the 1Password entry for that account and select “Edit.” Head over to the one-time password field and select it.
If you linked your account to 1Password’s authenticator by entering a secret key, the field will display it. If you linked your account by scanning a QR code, you will see a long sequence starting with something like otpauth://….. You’ll need to identify the secret key in this sequence before you can move your codes to a new authenticator.
Fortunately, spotting the secret key is pretty easy. Just look for the text “secret=”. The characters that occur immediately after it are your secret key.
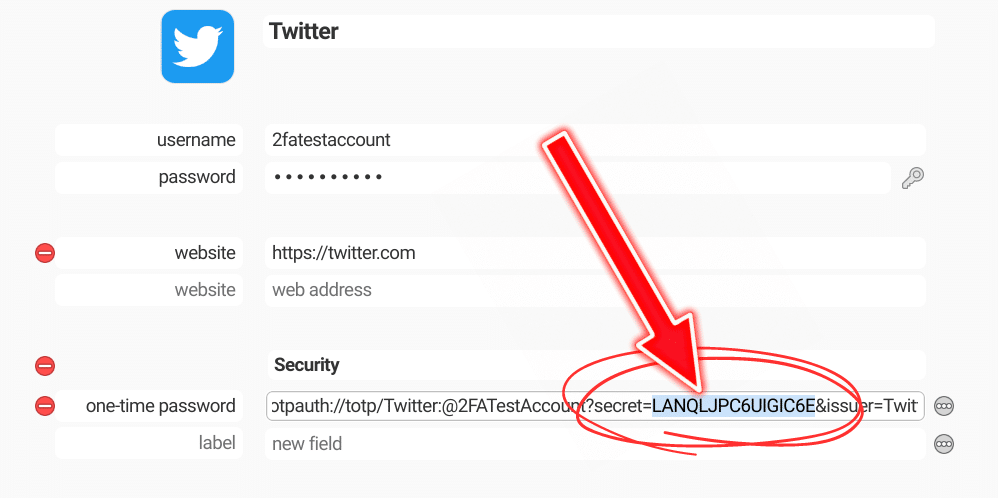
You’ll then just need to add your secret key to your new authenticator to get it to generate your 2FA codes.
Once you’ve done that, check the codes displayed match the ones in 1Password. If you want to delete your 2FA codes from 1Password, hit the red button with a horizontal line through it that’s to the left of the one-time password field. Then hit “Save.” You’re all done!
The takeaway
1Password offers a convenient way to protect your accounts with 2FA. Hopefully, by covering how to link your accounts to 1Password’s built-in authenticator, how to log in with it, and how to export your 2FA codes, you’ll be able to use it confidently. If you have any questions, let me know in the comments!
