Last updated on February 11th, 2024 at 02:13 am

Update February 11th: Skiff has been acquired by Notion and will be shutting down its suite of products within 6 months. If you use Skiff, you need to make plans to export your data and migrate to another service.
Skiff Mail is unique among privacy-focused email providers as it allows you to connect a custom domain for free. This means you can have your own personalized email of the form [email protected] for just the price of the domain.
While setting up your personalized email account for the first time can feel a bit overwhelming, it’s actually pretty straight forward. In this post, I’ll walk you through everything you need to do to get set up.
First, we’ll talk about connecting your domain to Skiff, which is the most complicated part. Then, we’ll go through setting up your alias, which is easy.
Let’s get started!
Connecting your domain
In what follows, I’ll assume you’ve purchased a domain from an external domain registrar, like Namecheap or Porkbun, instead of Skiff. That’s because if you purchase a domain directly from Skiff, it will be automatically connected to your account and you’ll be all set.
To connect your externally purchased domain to your Skiff account, you’ll need to edit your DNS records. To do this, you’ll first need to know where to find them.
You should be able to access them either with your domain registrar (e.g. Namecheap) or your web host (e.g. Flywheel). If you’re not sure where to edit them, enter your domain in a WHOIS lookup provider, like whoxy.com, and see what nameservers are listed.
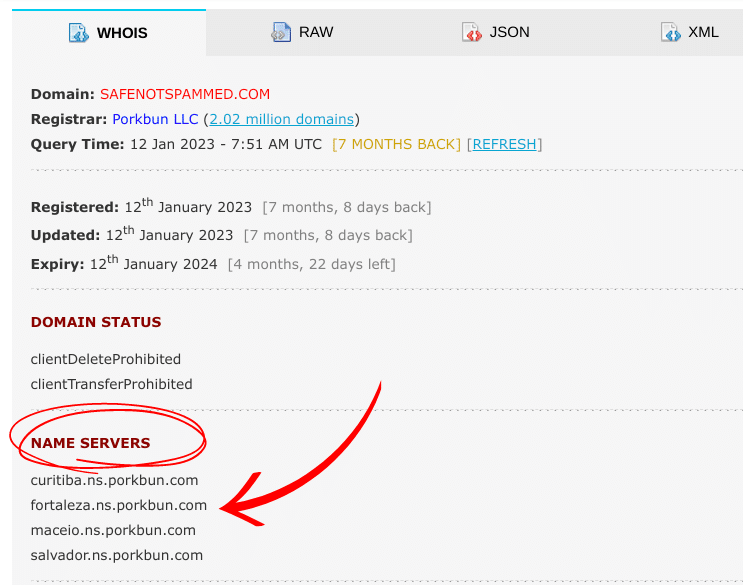
For example, when I look up safenotspammed.com, the custom domain I’ll be adding to my Skiff account in this walkthrough, I see the nameservers are at porkbun.com. This tells me I need to edit my DNS records at Porkbun, which is my domain registrar.
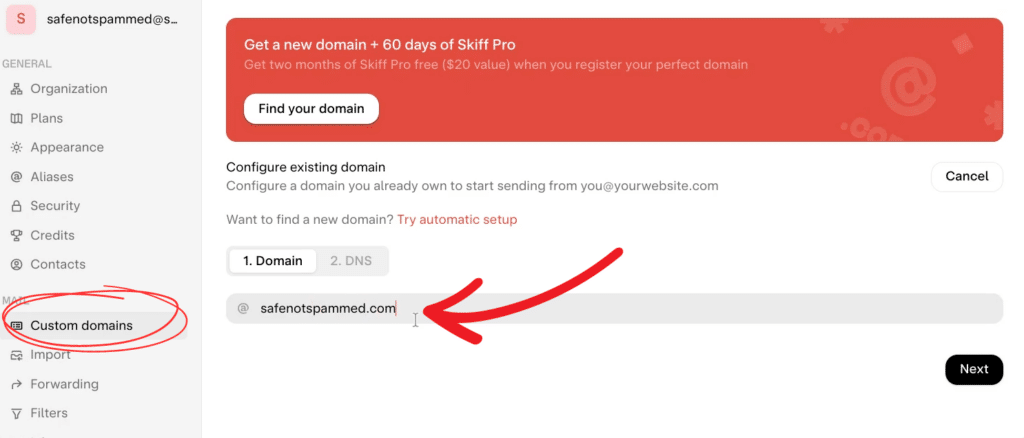
Once you know where to edit your DNS records, head over to your Skiff account. Then select “Settings” and click on “Custom domains.” Next, select “Configure domain” and you’ll be asked to enter your custom domain, e.g. safenotspammed.com.
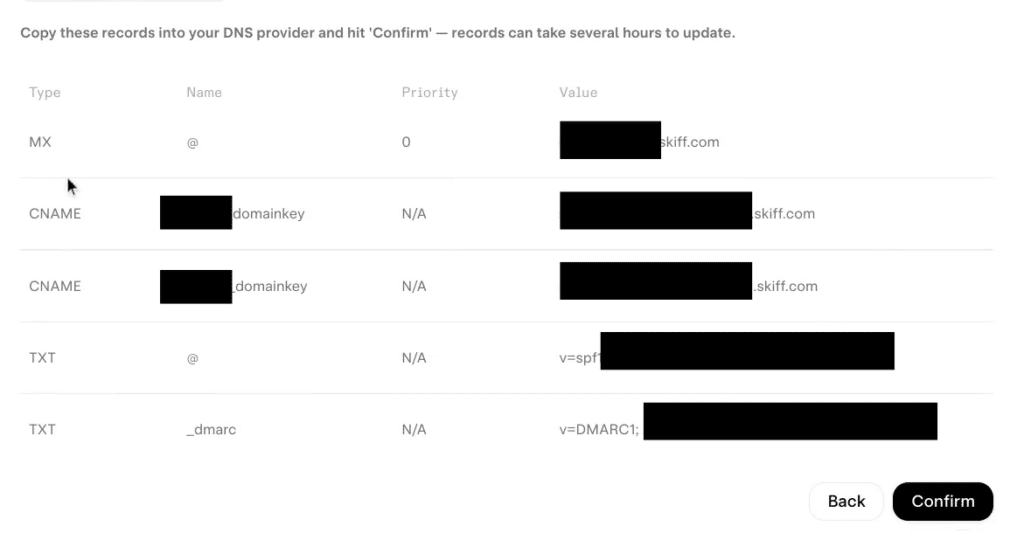
Then, once you hit “Next,” Skiff will give you a list of five different DNS records that you’ll need to add to your DNS provider. There should be one MX record, two CNAME records, and two TXT records.
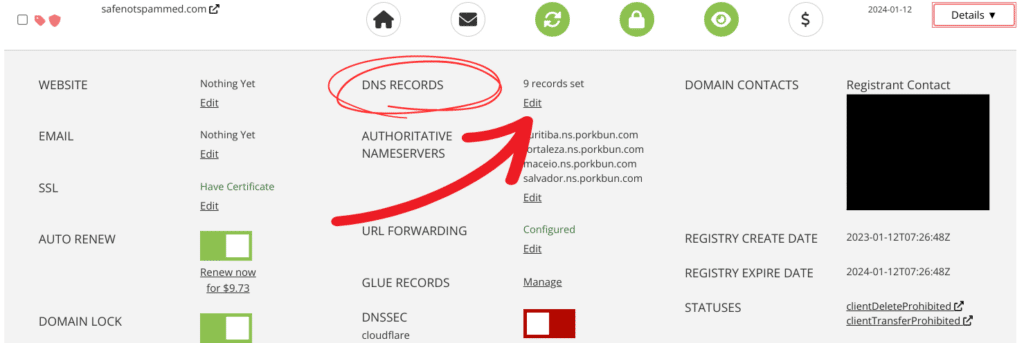
Once you have the DNS records, head on over to your DNS provider. In my case, that’s Porkbun. To edit the DNS records in Porkbun, head to “Domain management” and then click “Details” next to your domain. Look for “DNS records” and then click “Edit.”
You’ll then be able to add new DNS records for your domain. First, you’ll need to select the type of record you’re adding, e.g. MX, CNAME or TXT.
Next, you’ll need to enter what Porkbun calls the Host and Skiff calls the Name. To do this, just click the value in the Name column in Skiff and it will automatically copy it for you so you can just paste it into your DNS provider.
You’ll also need to add what Porkbun calls the Answer and Skiff calls the Value. Again, just click this in Skiff and it will be automatically copied for you.
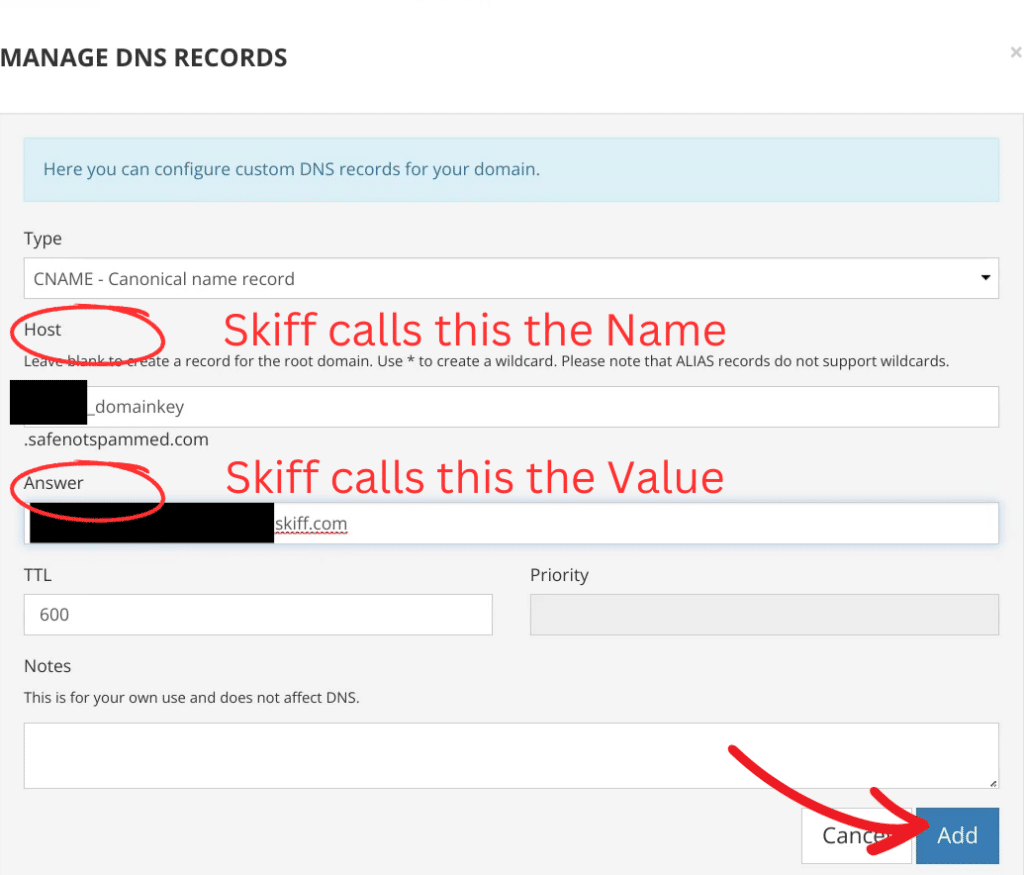
For the MX record, you’ll need to add the Priority value, too.
Once you’ve added a DNS record, make sure to save it, which you can do in Porkbun by clicking “Add.”
Then, once you’ve added each of the five DNS records, go back to Skiff and click “Confirm.” You’ll be taken to a screen that shows your domain is pending verification. You might then want to go for a walk or read a book while you wait for your DNS changes to propagate and be verified by Skiff. For example, my domain safenotspammed.com was pending for a couple of hours.
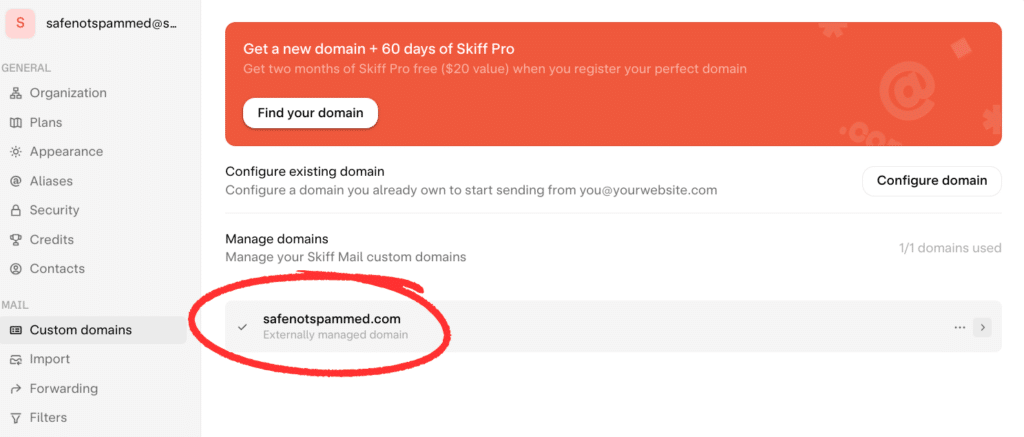
Hopefully, you’ll then see a green checkmark next to your domain, indicating that everything was verified successfully. If not, then you’ll want to try again, making sure to copy the values over to your DNS provider exactly as they are listed in Skiff.
Creating your alias
Now you’ve got your domain connected to Skiff, you’ll need to create an alias to set up your personalized email. So head to the settings menu, click on “Aliases” and select “Add alias.”
Then enter whatever you’d like for the first part of your personalized email, i.e. the bit before the “@.” You’ll see @skiff.com is listed as the last part of your new email, but you can click on the dropdown box to select your custom domain instead.
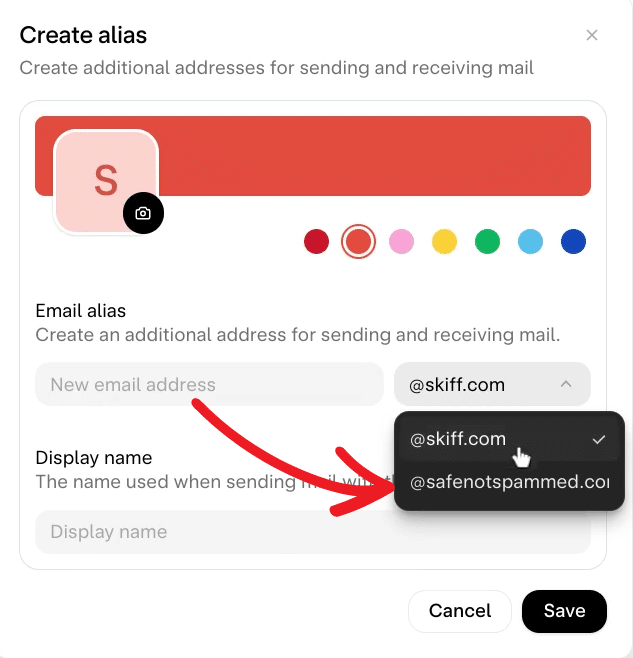
Finally, if you want, you can enter the display name you’d like to use with your new email.
Next, click “Save” and confirm you want to “Add alias.” Voila, your personalized email address is now ready for use!
The takeaway
If you purchased a domain from a registrar like Porkbun, connecting it to your Skiff account is straightforward, if a little tedious. Once connected, you just need to create an alias and then you’ll have your very own personalized email address with a privacy-focused email provider.
