Last updated on February 27th, 2023 at 03:34 pm
According to a survey I ran, receiving a code via text is the most popular type of two-factor authentication (2FA). Security conscious Twitter users were therefore probably disappointed to learn that SMS 2FA will only be available to Twitter Blue subscribers from March 20th.
However, non-Twitter Blue subscribers can still protect their accounts with 2FA using an authenticator or a security key. And I’ll let you in on a little secret—security keys are quicker and easier to use than receiving a code via text, while being far more secure.
In this how-to guide, I’ll explain what security keys are and how to use them to protect your Twitter account. I’ll also show you what the login process looks like when security keys are enabled. For those of you who would prefer a video version of this guide, check out the YouTube video I made here:
What are security keys?
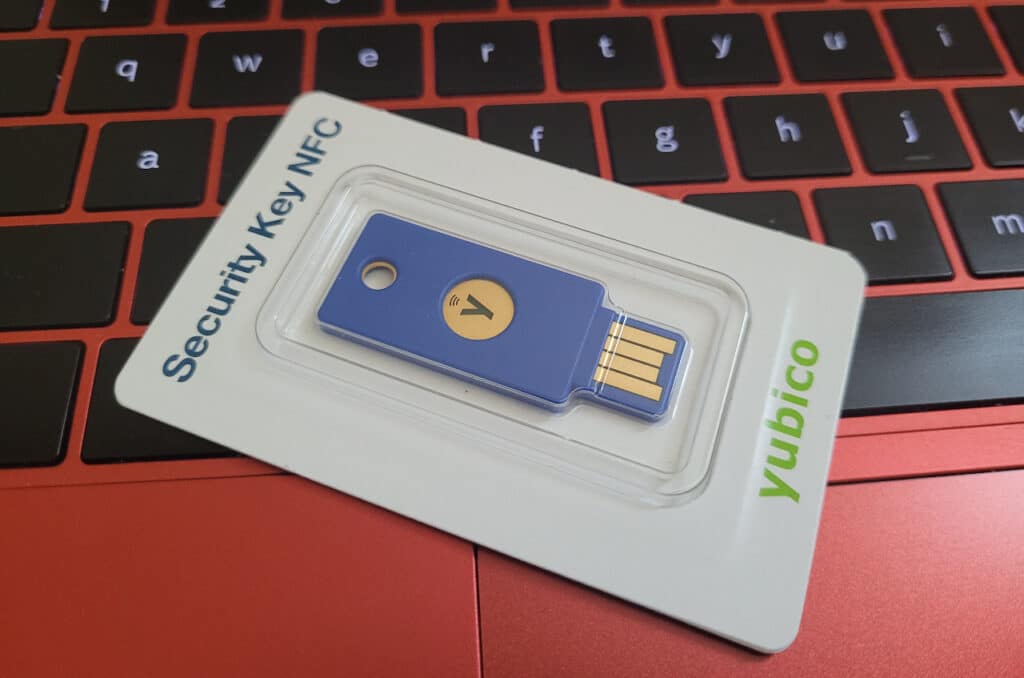
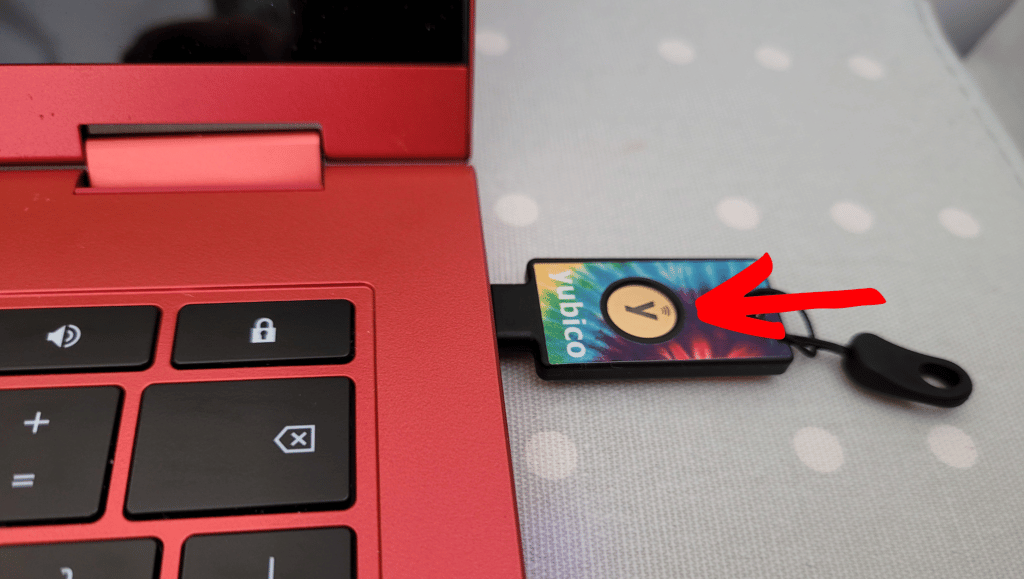
Security keys look very much like a thumb drive. And, like a thumb drive, they plug into your devices. Unlike a thumb drive, however, they have a button you tap to verify it’s really you logging into your account and not a fraudster.
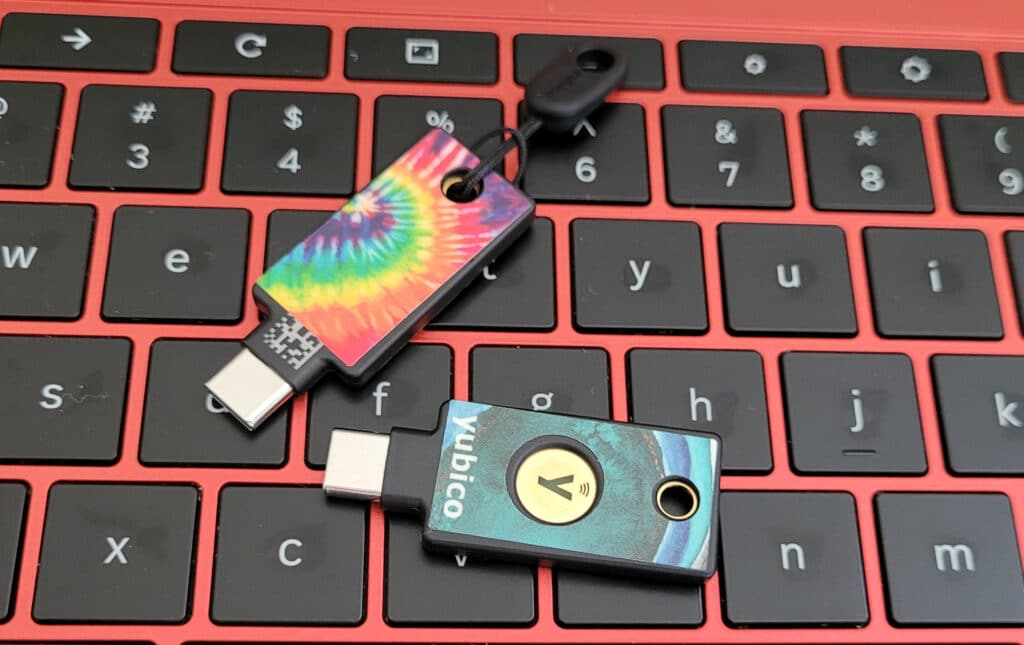
The great thing about using security keys for 2FA is you don’t have to mess around with one-time codes at all. Once they’re set up, you just plug one in, tap and go.
They’re also the most secure form of 2FA you can use. Unlike SMS-based 2FA, they’re not vulnerable to SIM-swapping, where criminals steal your phone number to get your 2FA codes. And while SIM-swaps aren’t a problem for authenticators, phishing is. But security keys are resistant to phishing attacks, too.
How do I set up 2FA with a security key on my Twitter account?
Protecting your Twitter account with a security key is incredibly easy, though you need to have at least one, and preferably two, keys to get started. Having more than one key added to your account means you have a backup so you won’t get locked out if you lose one.
If you’re looking for security keys, you can find them over at Yubico and Google. The ones I’m using in this guide are both the YubiKey 5C NFC. However, the YubiKey Security Keys and Google security keys are cheaper, starting at $25 and $30, respectively.
The keys you buy to protect your Twitter account can also secure your Gmail, Facebook and Dropbox accounts, along with many others. You can see which accounts are compatible with YubiKeys by using Yubico’s tool here.
Once you have your keys, setting them up with your Twitter account will take just a few minutes. Here’s how you do it step by step.
Step 1: Go to the 2FA settings in your Twitter account
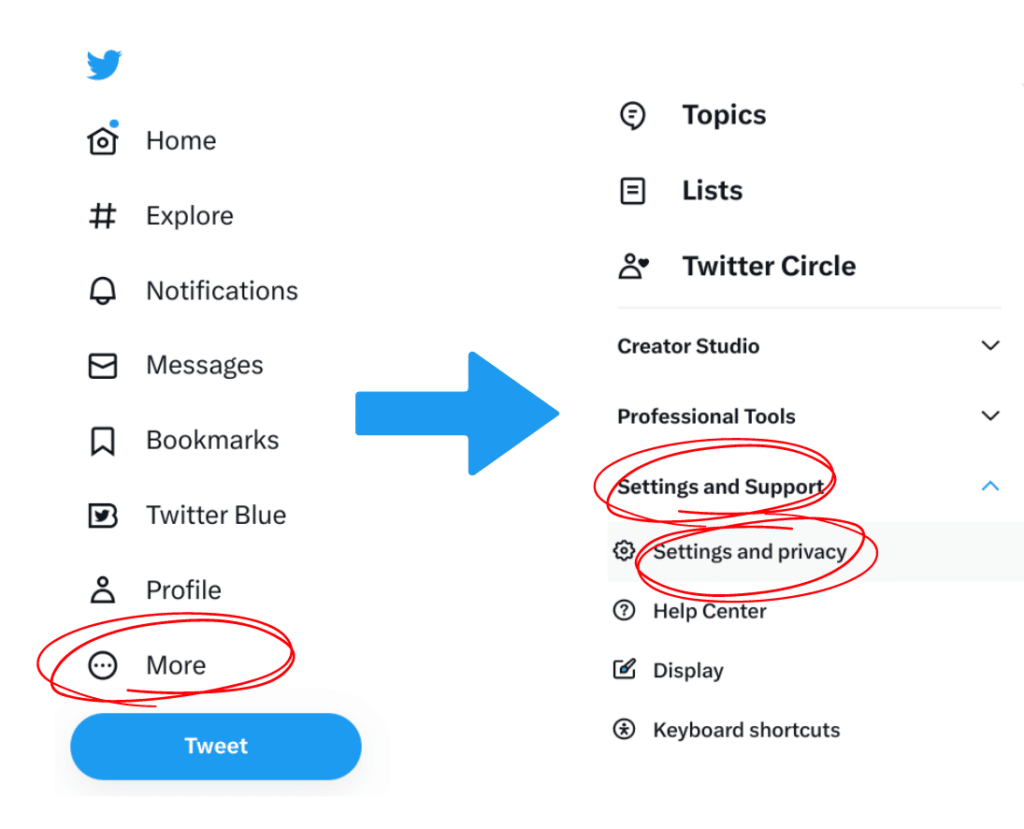
To do this, first select “More,” then click on “Settings and Support,” followed by “Settings and Privacy.”
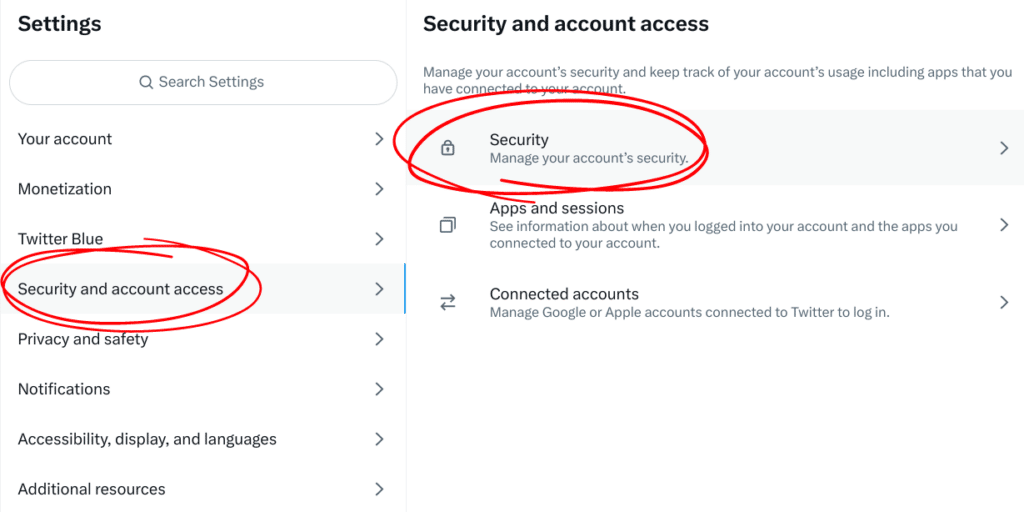
Next, you’ll want to select “Security and account access,” then “security.”
Finally, click on “Two-factor authentication.”
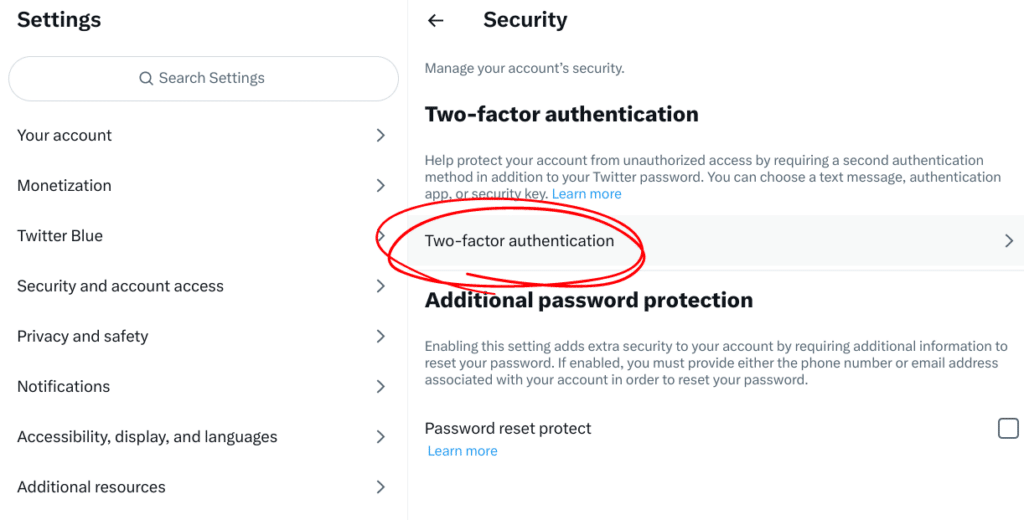
Step 2: Select “security key” and follow Twitter’s prompts
In the 2FA settings, look for “Security key” and click on the box next to it to get started.
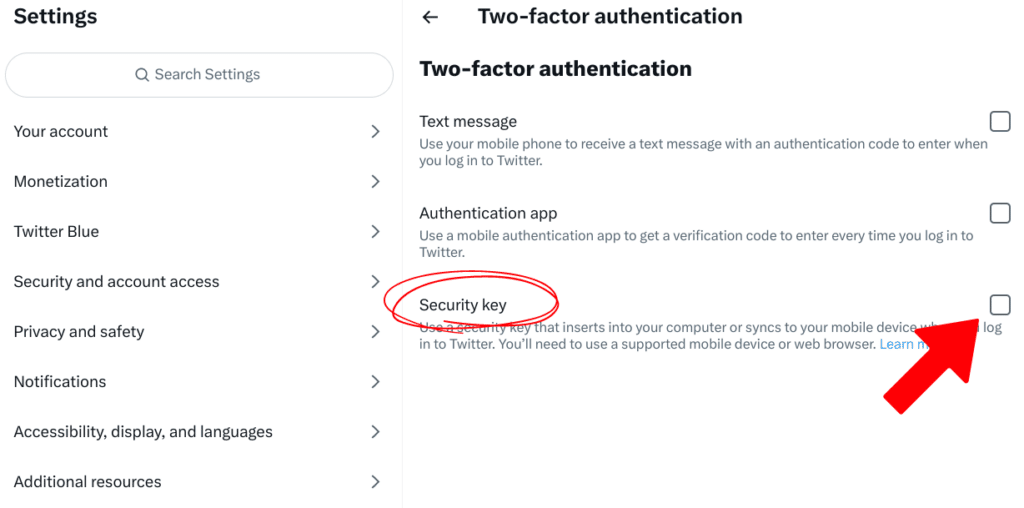
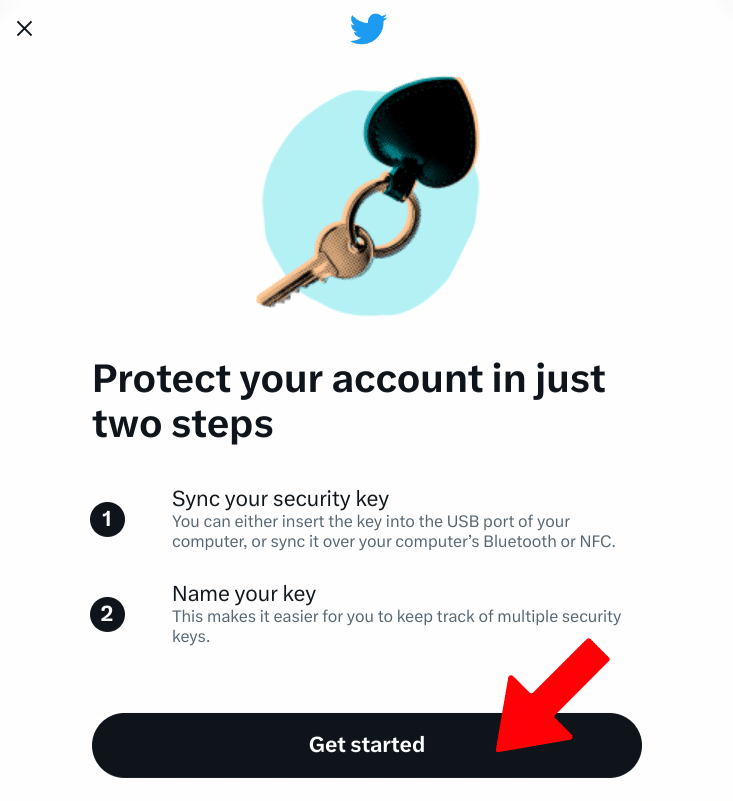
Twitter will tell you you’ll need to sync your security key and give it a name in order to use it to protect your account. Hit the “get started” button.
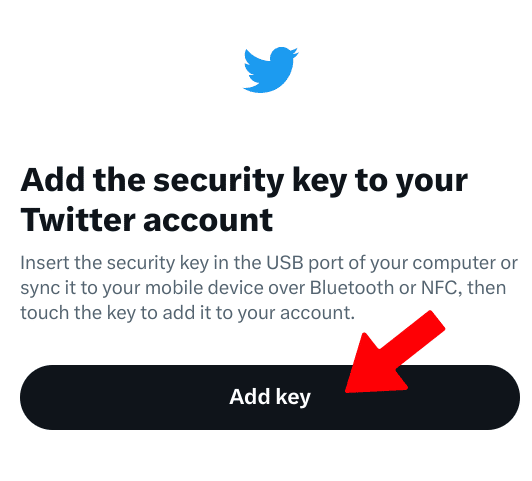
Next, you’ll need to insert the security key into your device. Then, click “add key” to continue.
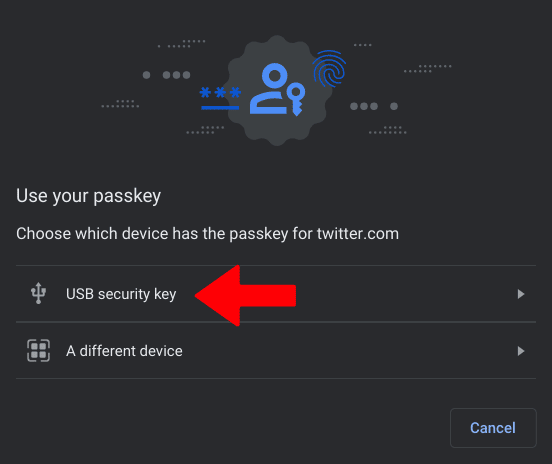
A dialogue will then pop up, asking you whether you would like to use your security key or something else to create a passkey for Twitter. Select “USB security key.”
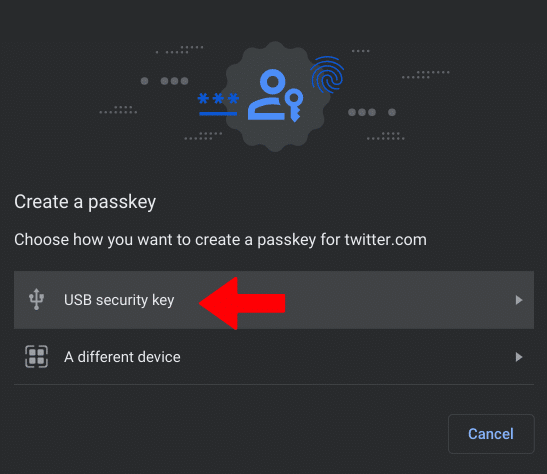
Twitter will then prompt you to touch the button on your security key, so go ahead and tap it to add it to your account.
Next, you’ll be asked to name your key. Give it a nice descriptive name so that if you need to remove it from your account later, e.g. because you lost it, you don’t accidentally delete the wrong key!
Step 3: Save your single use backup code
Once you’ve successfully set up your security key, Twitter will tell you that “You’re all set,” but don’t click that “Done” button just yet! First, save the backup code on that screen somewhere safe, as you’ll need to use it to log in if you lose all of your security keys.
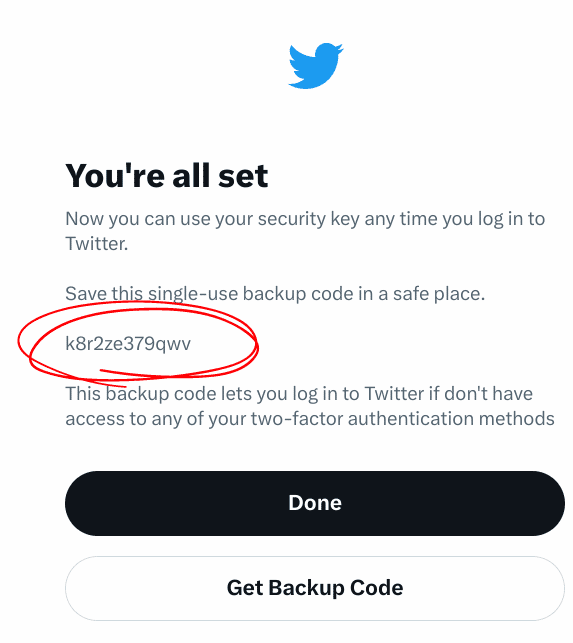
Remember the code is only good for one login, so if you lose your security keys, log in with the code and turn off two-factor authentication. You can then set it up again from scratch, either with new security keys or with an authenticator.
Step 4: Add a second key to your account as a backup
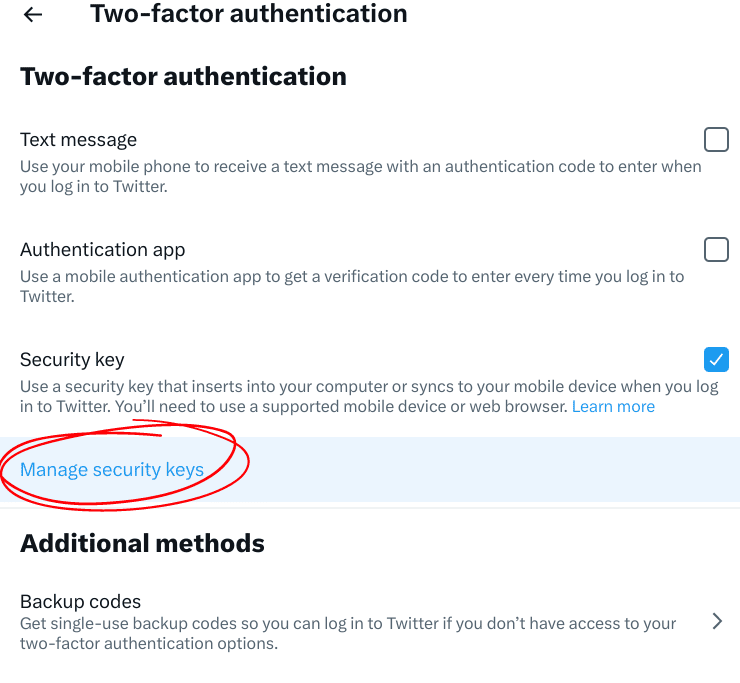
Once you’ve added your first key, select “Manage security keys” and you’ll find the option to “add another key.” Click it and Twitter will walk you through the process again with your second key.

How do I log in with a security key?
Logging in with a security key is super easy.
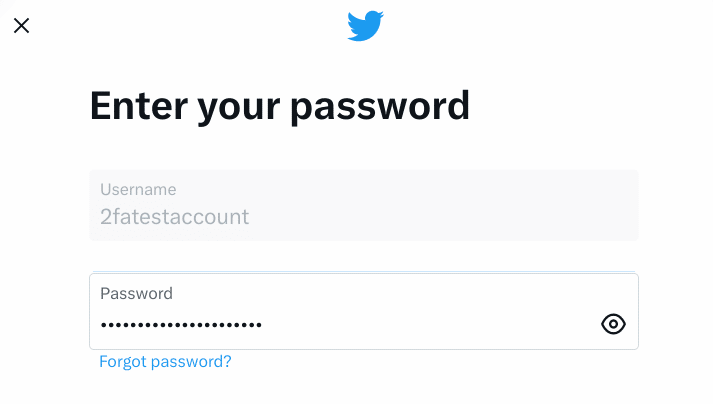
Step 1: Enter your username and password as usual
Step 2: Select USB security key from the dialogue
Step 3: Tap the button on your security key

That’s it!
The takeaway
Security keys are the most secure method of 2FA. They’re also, in my opinion, the most convenient to use. Just plug them in, tap and go!
