
Tuta (formerly Tutanota) is a privacy focused email and calendar service. Its free tier allows you to create an email address using any of the following domains: tutamail.com, tuta.io, tutanota.com, tutanota.de, keemail.me. However, if you have a premium account, you can also set up an email address using the tuta.com domain or your own custom domain.
In this post. I’ll walk you through the process of connecting your own domain to your Tuta account and creating a customized email address of the form [email protected]. As you’ll see, it’s pretty straightforward to get up and running!
Setting up your email
In order to connect your custom domain to your Tuta account, you’ll need to have a subscription to Tuta (which starts at around $3.25 a month), a custom domain (which costs around $10 a year from a registrar like Porkbun), and the ability to edit the DNS records for your custom domain. Usually, you’ll edit your DNS records at your registrar or web hosting provider, though if you use a service like Cloudflare, you’ll edit your DNS records there.
Verifying domain ownership
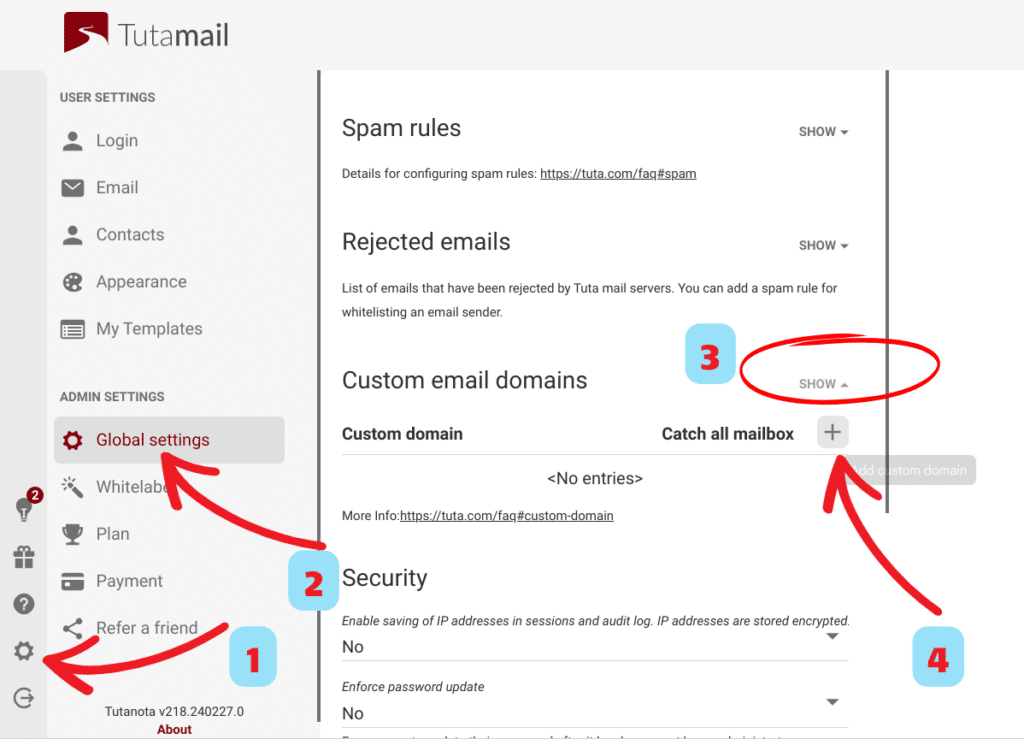
Once you’re ready to connect your custom domain, log in to your Tuta account and hit the “Settings” button in the bottom left-hand corner. Then, select “Global settings,” hit “Show” next to “Custom email domains” and hit the “+” button. Tuta will then walk you through the process of connecting your custom domain.
First, you’ll need to enter your custom domain in the field that appears. I used safenotscammed.win for this tutorial. Tuta will then ask you to add a new TXT DNS record to verify that you own your domain.
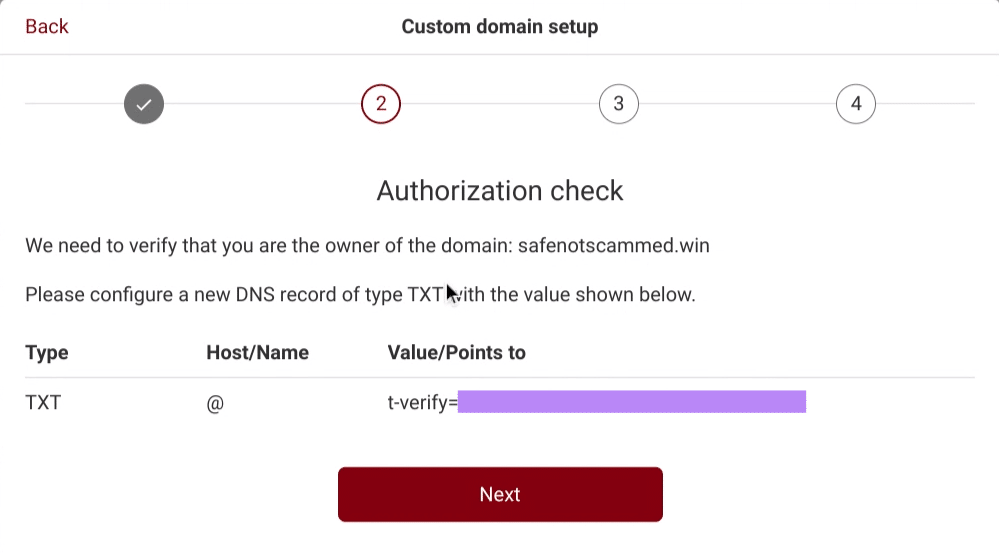
At this point, you’ll need to hop over to your DNS provider to add the new record. In my case, that’s Porkbun.
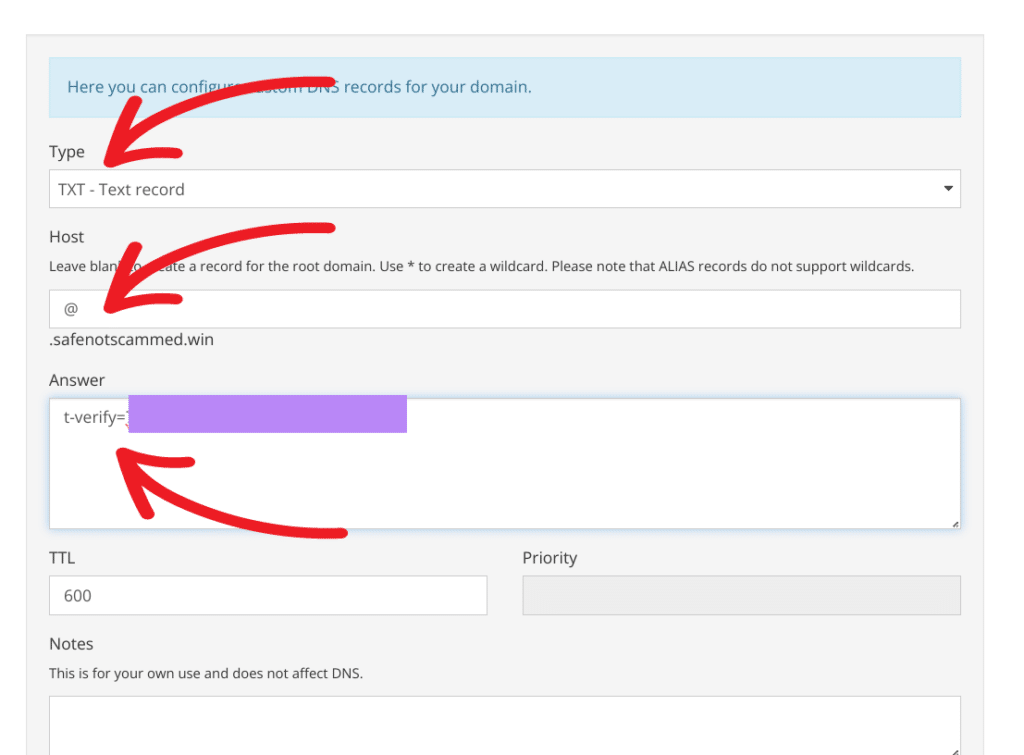
Then, select the right type of DNS record (TXT), enter “@” (without quotation marks) in the host/name field and then enter the long value Tuta provides (it starts with t-verify=) in the answer or value field. Make sure you save your changes!
Then, head back to Tuta and click on the “Next” button. If everything is working correctly, you’ll see a message saying your domain has been connected to your account and will then be asked to create your new email address.
However, don’t panic if Tuta can’t verify you own your domain right away. It can take a bit of time for the DNS record you added to process, so just wait a few more minutes. If it’s still not working after that, go back and double check you entered the DNS record correctly and try again.
Choosing your email address and adding the remaining DNS records
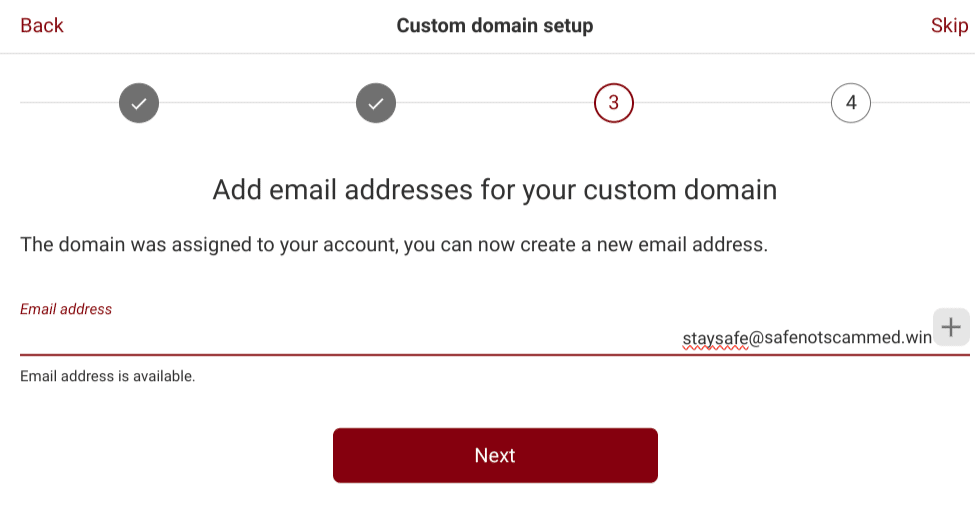
It’s now time to decide which email address you want to use with your custom domain. Once you’ve decided, enter the address you’ve chosen and then hit the plus sign. If you want to create more than one email address, add the others, too. Then click “Next.”
Tuta will then give you more DNS records to enter at your DNS provider. This time, you’ll need to enter MX, CNAME and TXT records.
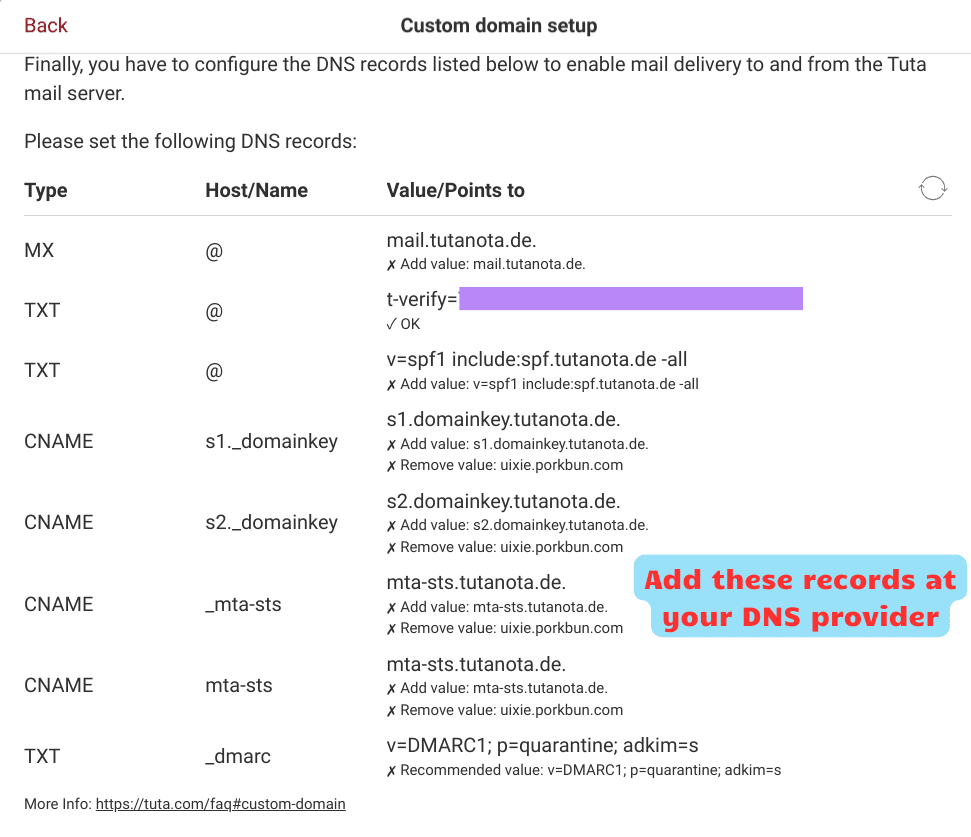
The first DNS record you’ll need to enter is the MX record. In your DNS provider, select the MX DNS record type and enter “@” (without quotation marks) in the host/name field and “mail.tutanota.de” (again without quotation marks) in the answer/value field. You will also need to enter a value in the priority field, though Tuta does not provide one. However, the value you enter here doesn’t really matter. I entered 10 and my mail works great!
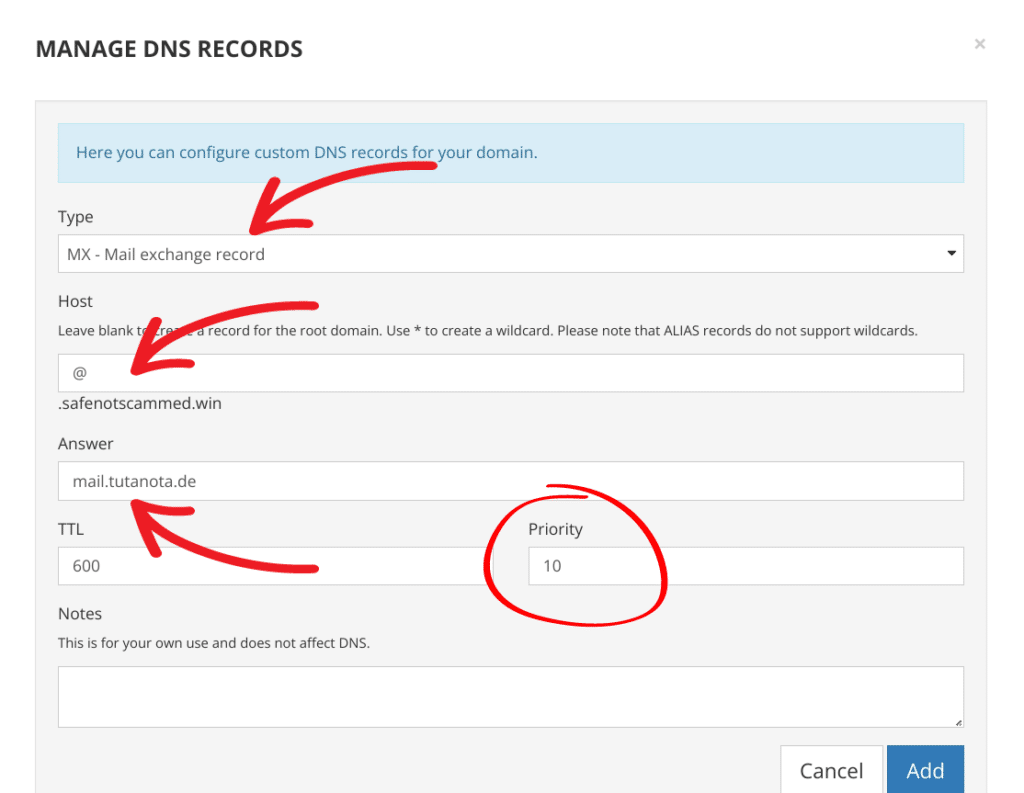
Once you’ve completed the MX record, save it and move on to the next DNS record. However, you don’t need to enter the TXT record with the value that starts with “t-verify=” again.
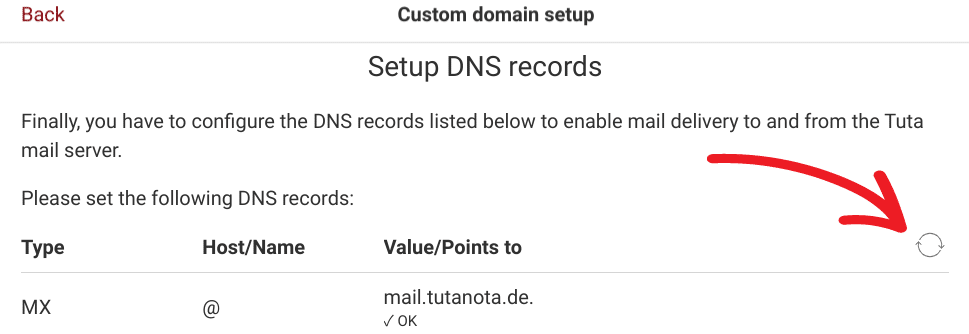
When you’ve finished adding all the DNS records, hit the refresh button in Tuta to check if it can verify the records you’ve added. You’ll know everything is working if you see small checkmarks underneath each record Tuta told you to add. If there’s a problem, wait for a few minutes before hitting the refresh button again, as it can take a while for the new DNS records to be processed.
Finally, you just need to hit “Finish” and your new email address will be ready to use!
Making your custom email address the default sending address
If you’d like, you can make your new custom email address the default sending address for your Tuta account. That way, whenever you send an email, your personalized address will automatically be populated as the sender instead of your tutanota.com address.
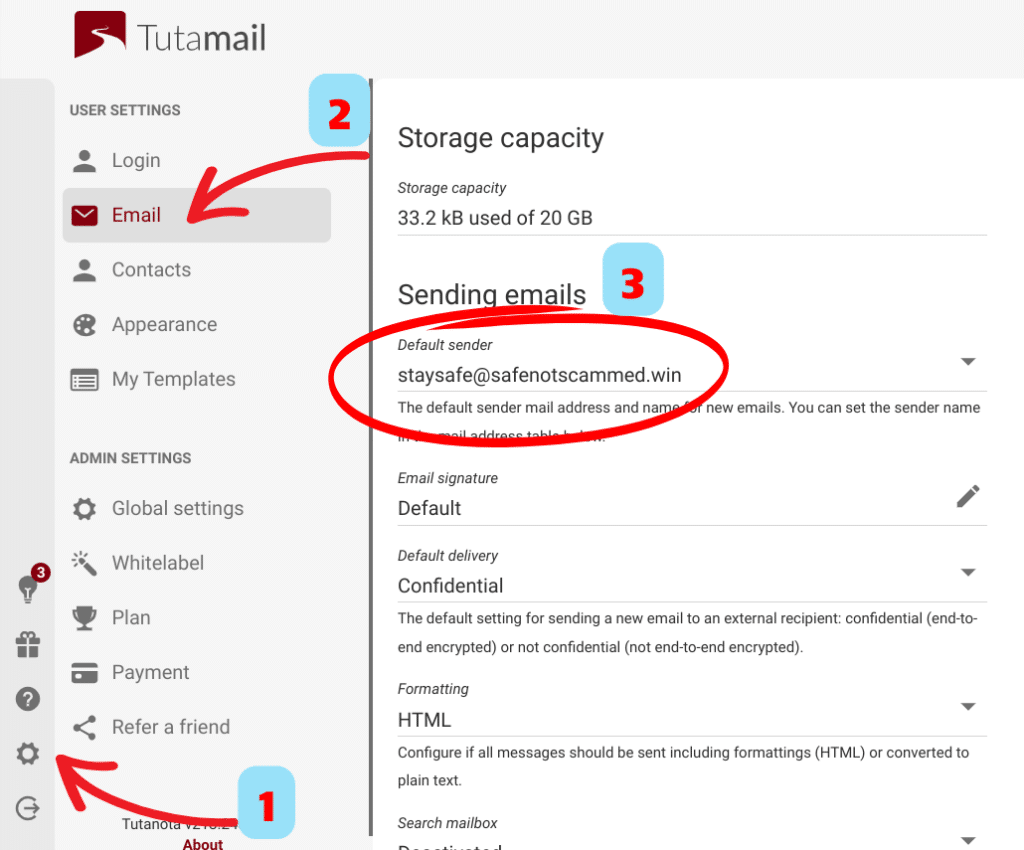
To set the default sending address, click the settings button at the bottom left of the screen. Then, select “Email” on the left-hand side. Under “Sending emails” you’ll see the address that is listed as the default sender. To change it, click on the email address listed there and Tuta will display a dropdown box of the email addresses you can choose from. Select the one you want and you’re good to go!
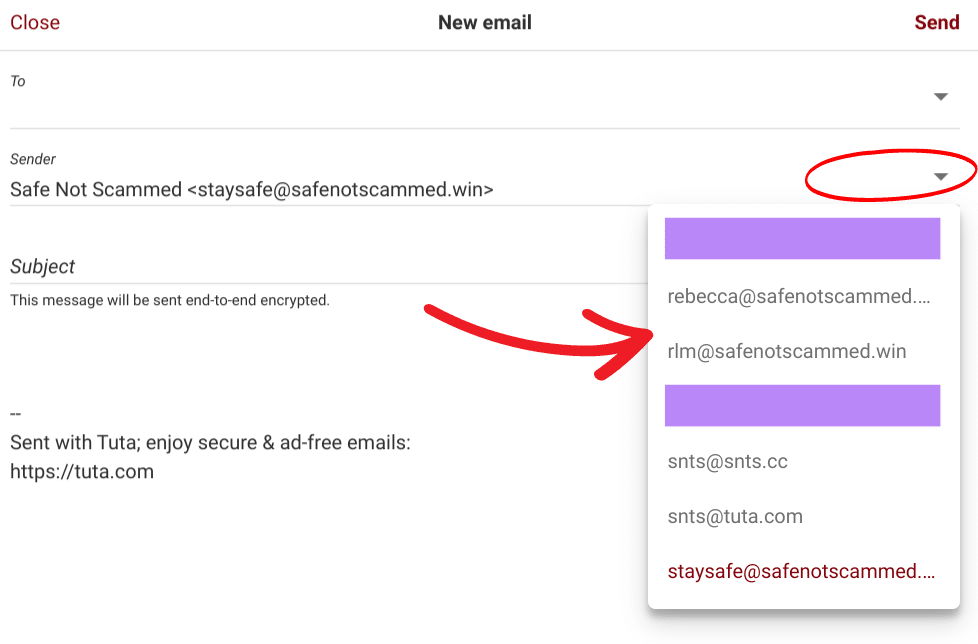
If you ever want to send mail from a different address associated with your Tuta account, just click on the sender’s address when composing your email. A dropdown list will display and you can select the email address you want to use for that email from there.
Adding more email addresses with the same custom domain
If you’d like, you can add extra email addresses to your Tuta account using the same custom domain. In fact, Tuta allows you to add unlimited such addresses and setting them up is easy.
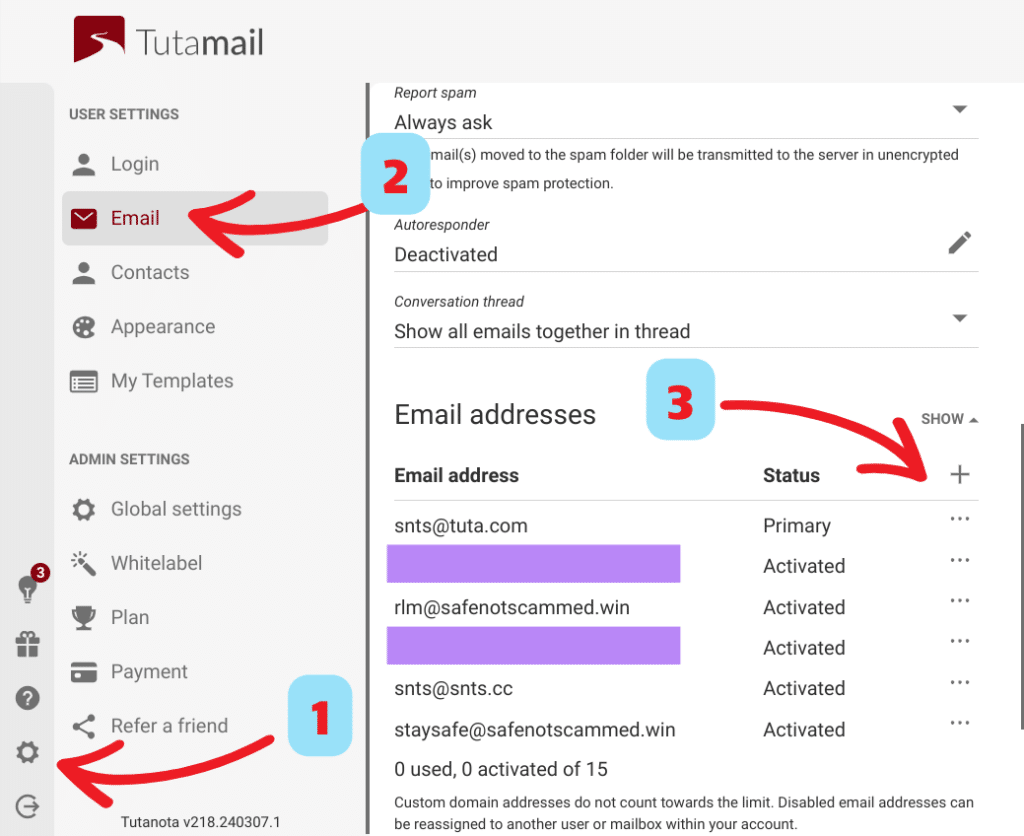
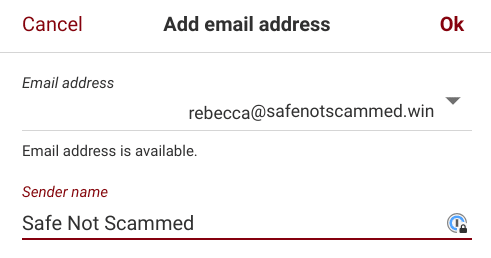
First, head to “Settings” and then “Email.” Next, scroll down to “Email addresses” and then click “Show.” Then click on the “+” sign and select your custom domain. Type in what you would like to go before the “@” sign in your new email address and the sender name you’d like to use with this address. Finally, click “OK” and your new email address is ready for use!
The takeaway
Setting up a custom email address with Tuta is straightforward—it just requires a bit of copying and pasting. And as it costs under $50 a year for a domain and a premium Tuta account, setting up a private, personalized email address is affordable, too!
